Quick Payment Requests in Online Payments
Sometimes you need to collect payment fast – for a small job, a supply run, or a last-minute addition to a project – without the overhead of creating a formal estimate, proposal, invoice or change order. A Payment Request lets you send a payment link to your client in seconds, directly from your desktop or mobile device, so you can get paid on the spot and keep every penny tracked inside of Houzz Pro.
Access Payment Requests
There are two ways to initiate a payment request from your client.
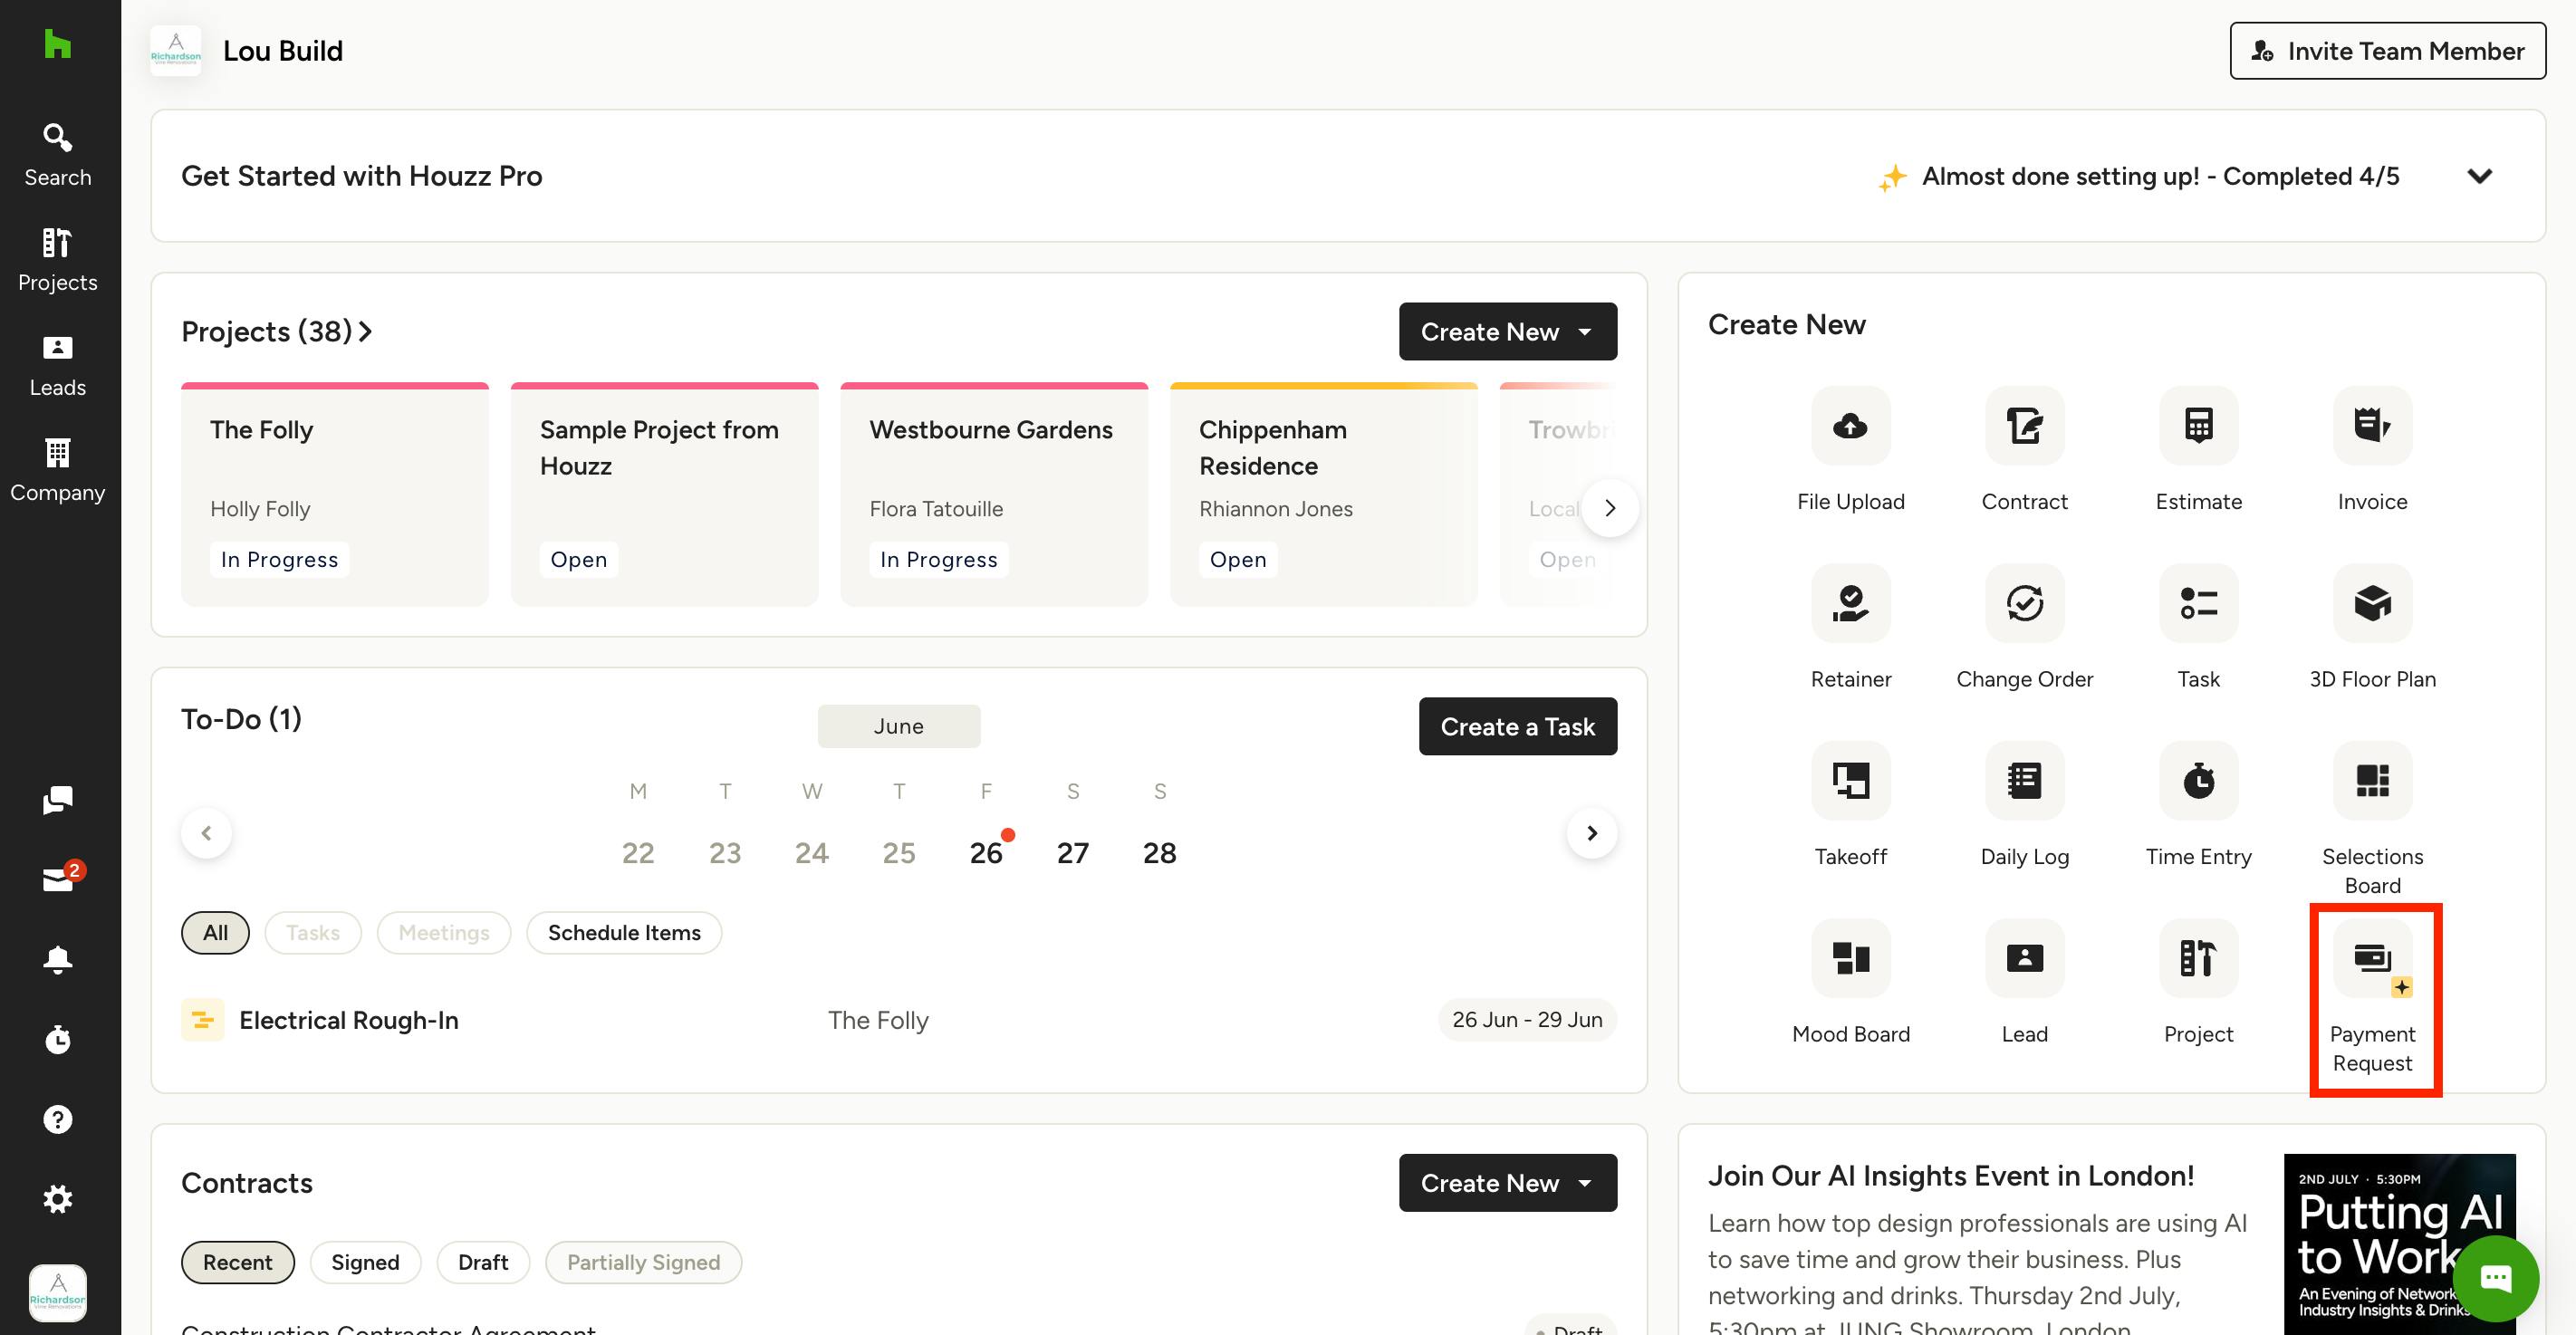
From the Homepage: On your Houzz Pro homepage, look for the Create New section on the right side and select Payment Request.
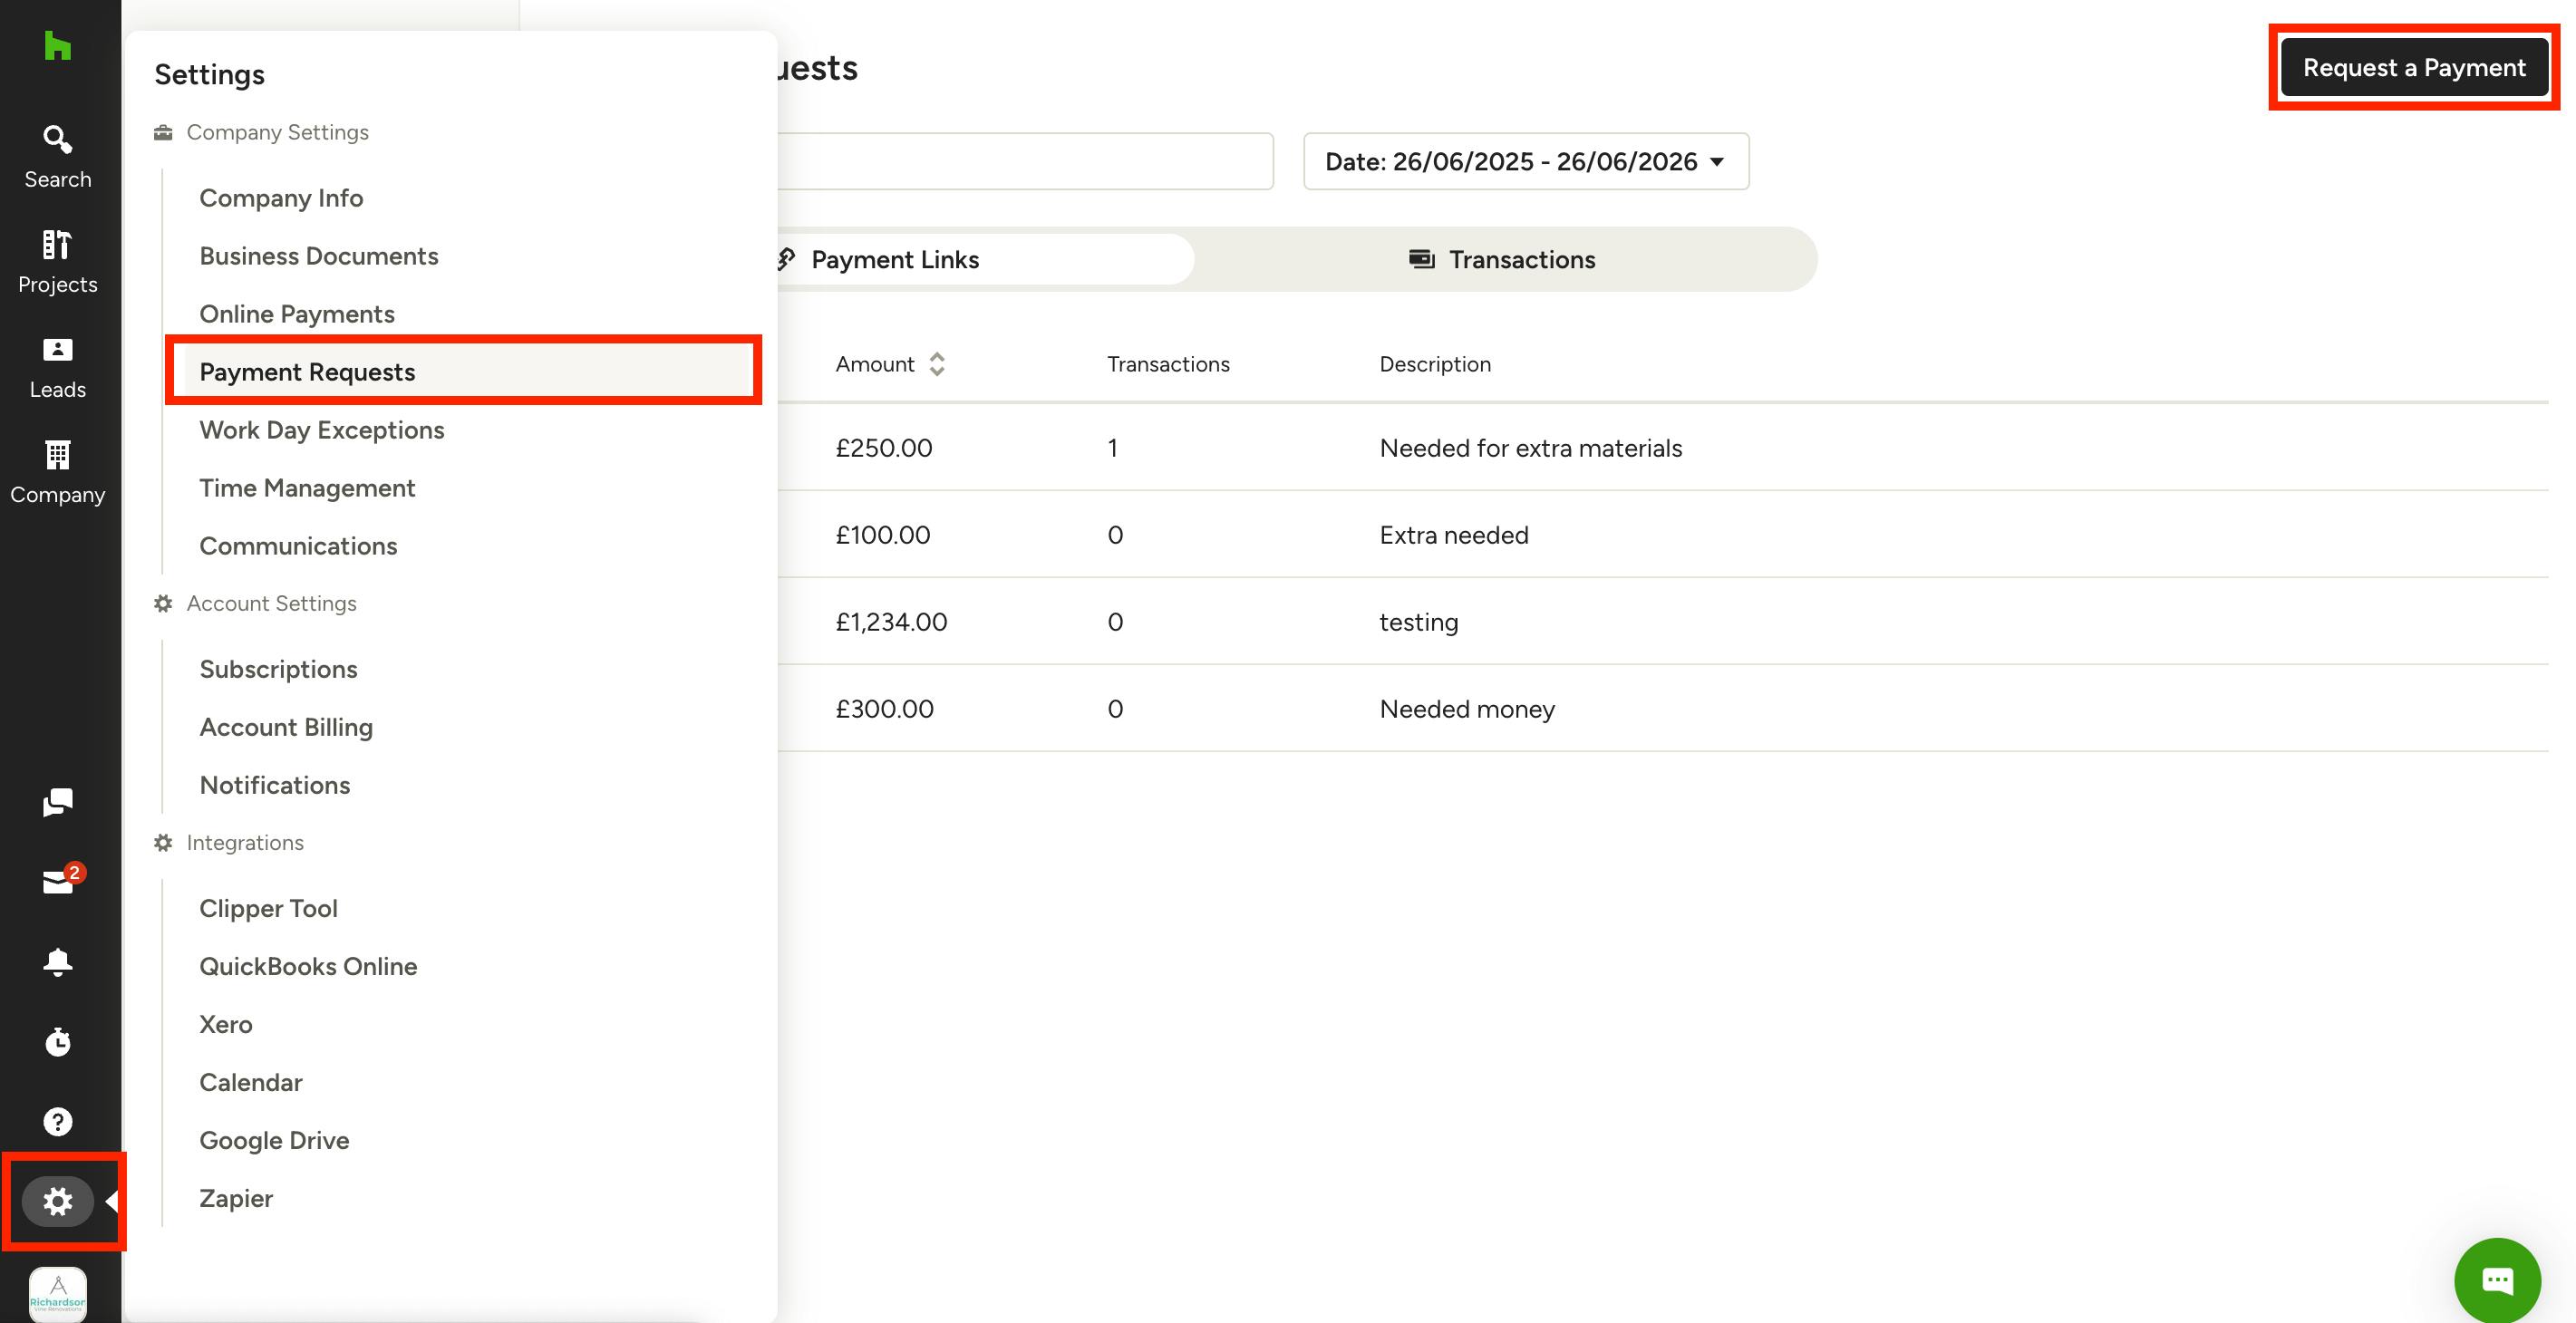
From the Left Navigation: Click on the Settings icon, then select Payment Requests from the menu. To create a new payment, select Request a Payment at the top.
Create New Payment Request
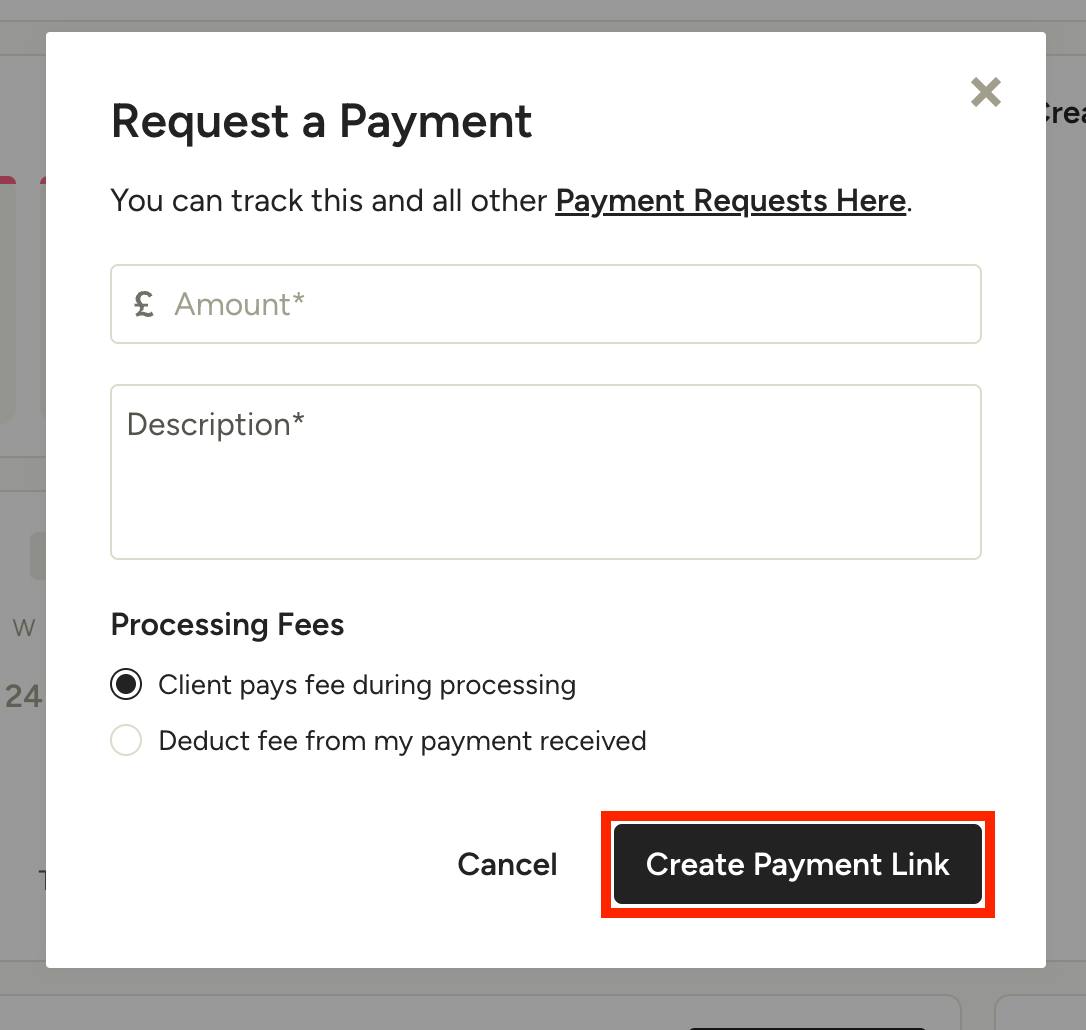
Once you click Payment Request or Request a Payment in either location, a new screen will appear where you can input payment information. Enter the amount, and be sure to include a description so the client knows what they are paying for.
Here, you will also need to decide how you want to handle fees by selecting one of the options.
- Client pays fee during processing means the client will cover the transaction fees associated with online payments. The fees will be transparently added onto the overall payment.
- Deduct fee from my payment received means you will cover the transaction fees associated with online payments. The fees will be deducted from your overall payout.
Once complete, select Create Payment Link.
Share Payment Link with Client
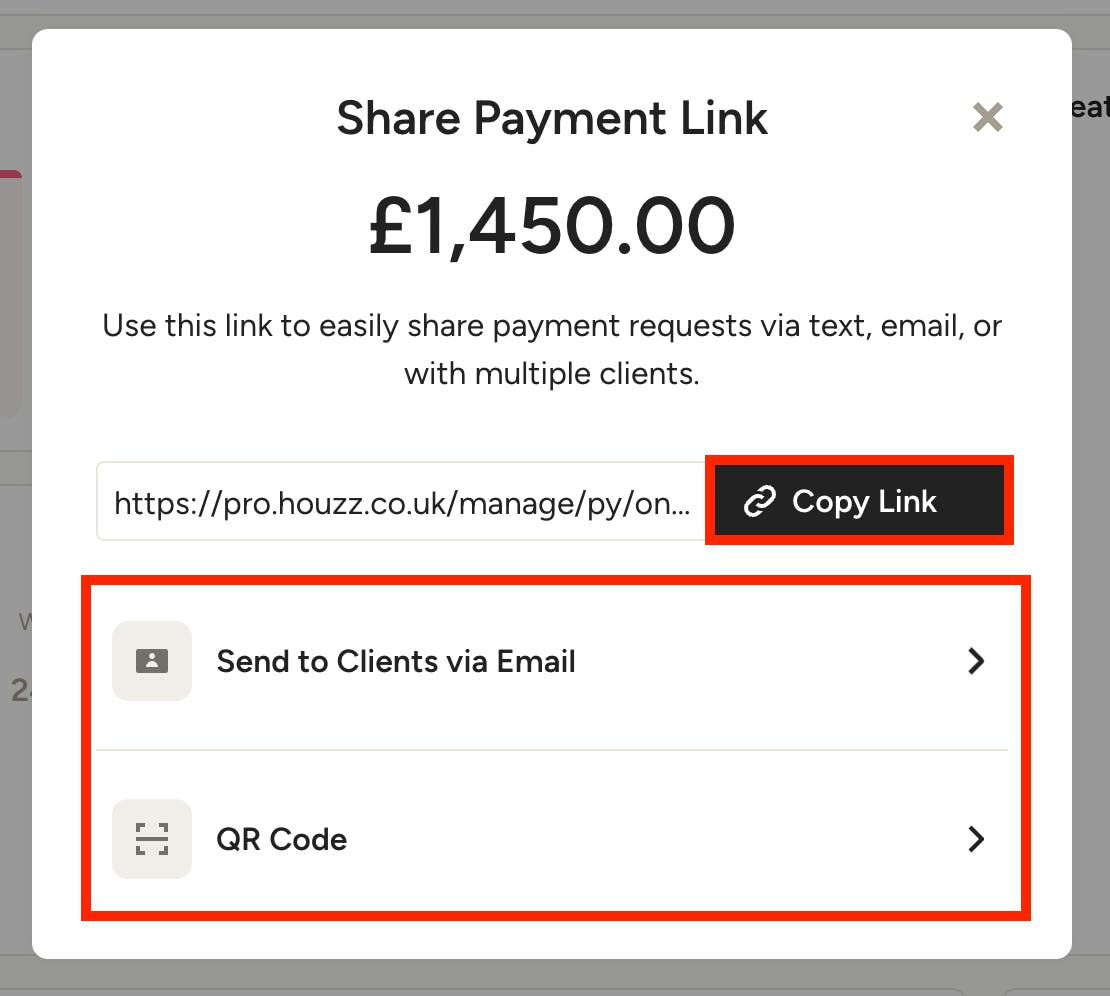
Once the link is created successfully, you have a few options to share it with your client. You can:
- Copy Link: Click Copy Link to manually copy the URL and send it via text, chat, or another preferred channel.
- Send to Clients via Email: This option will open an email form. Enter the client's email address (separate multiple emails with commas) at the top, then click Send. If your client is associated with an existing project, you can connect the payment to the project under this option.
- QR Code: View or download a scannable QR code for the client to scan directly.
Client View of Payment Request
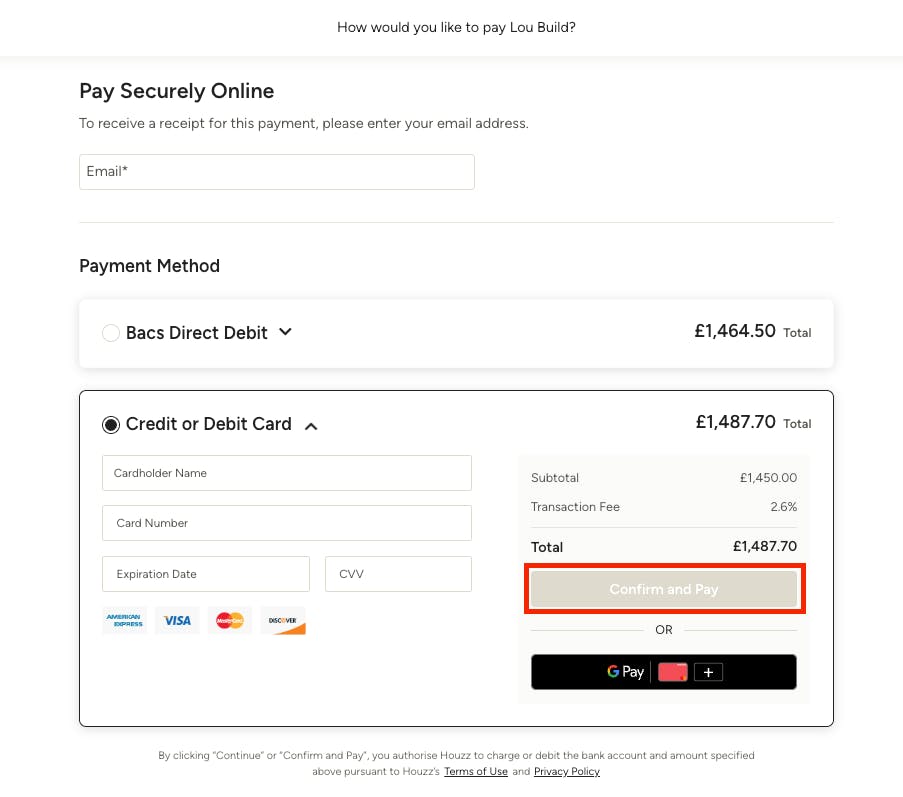
When the client clicks the payment link, they will be taken to a secure online checkout page.
Here, they are required to provide an email address – this ensures you know exactly who submitted the payment.
They can choose their payment method. This includes credit or debit card, bank transfer, and Google Pay.
Any processing fees will appear transparently in the payment summary based on your settings.
The client clicks Confirm and Pay to complete the transaction.
Track Payment Requests
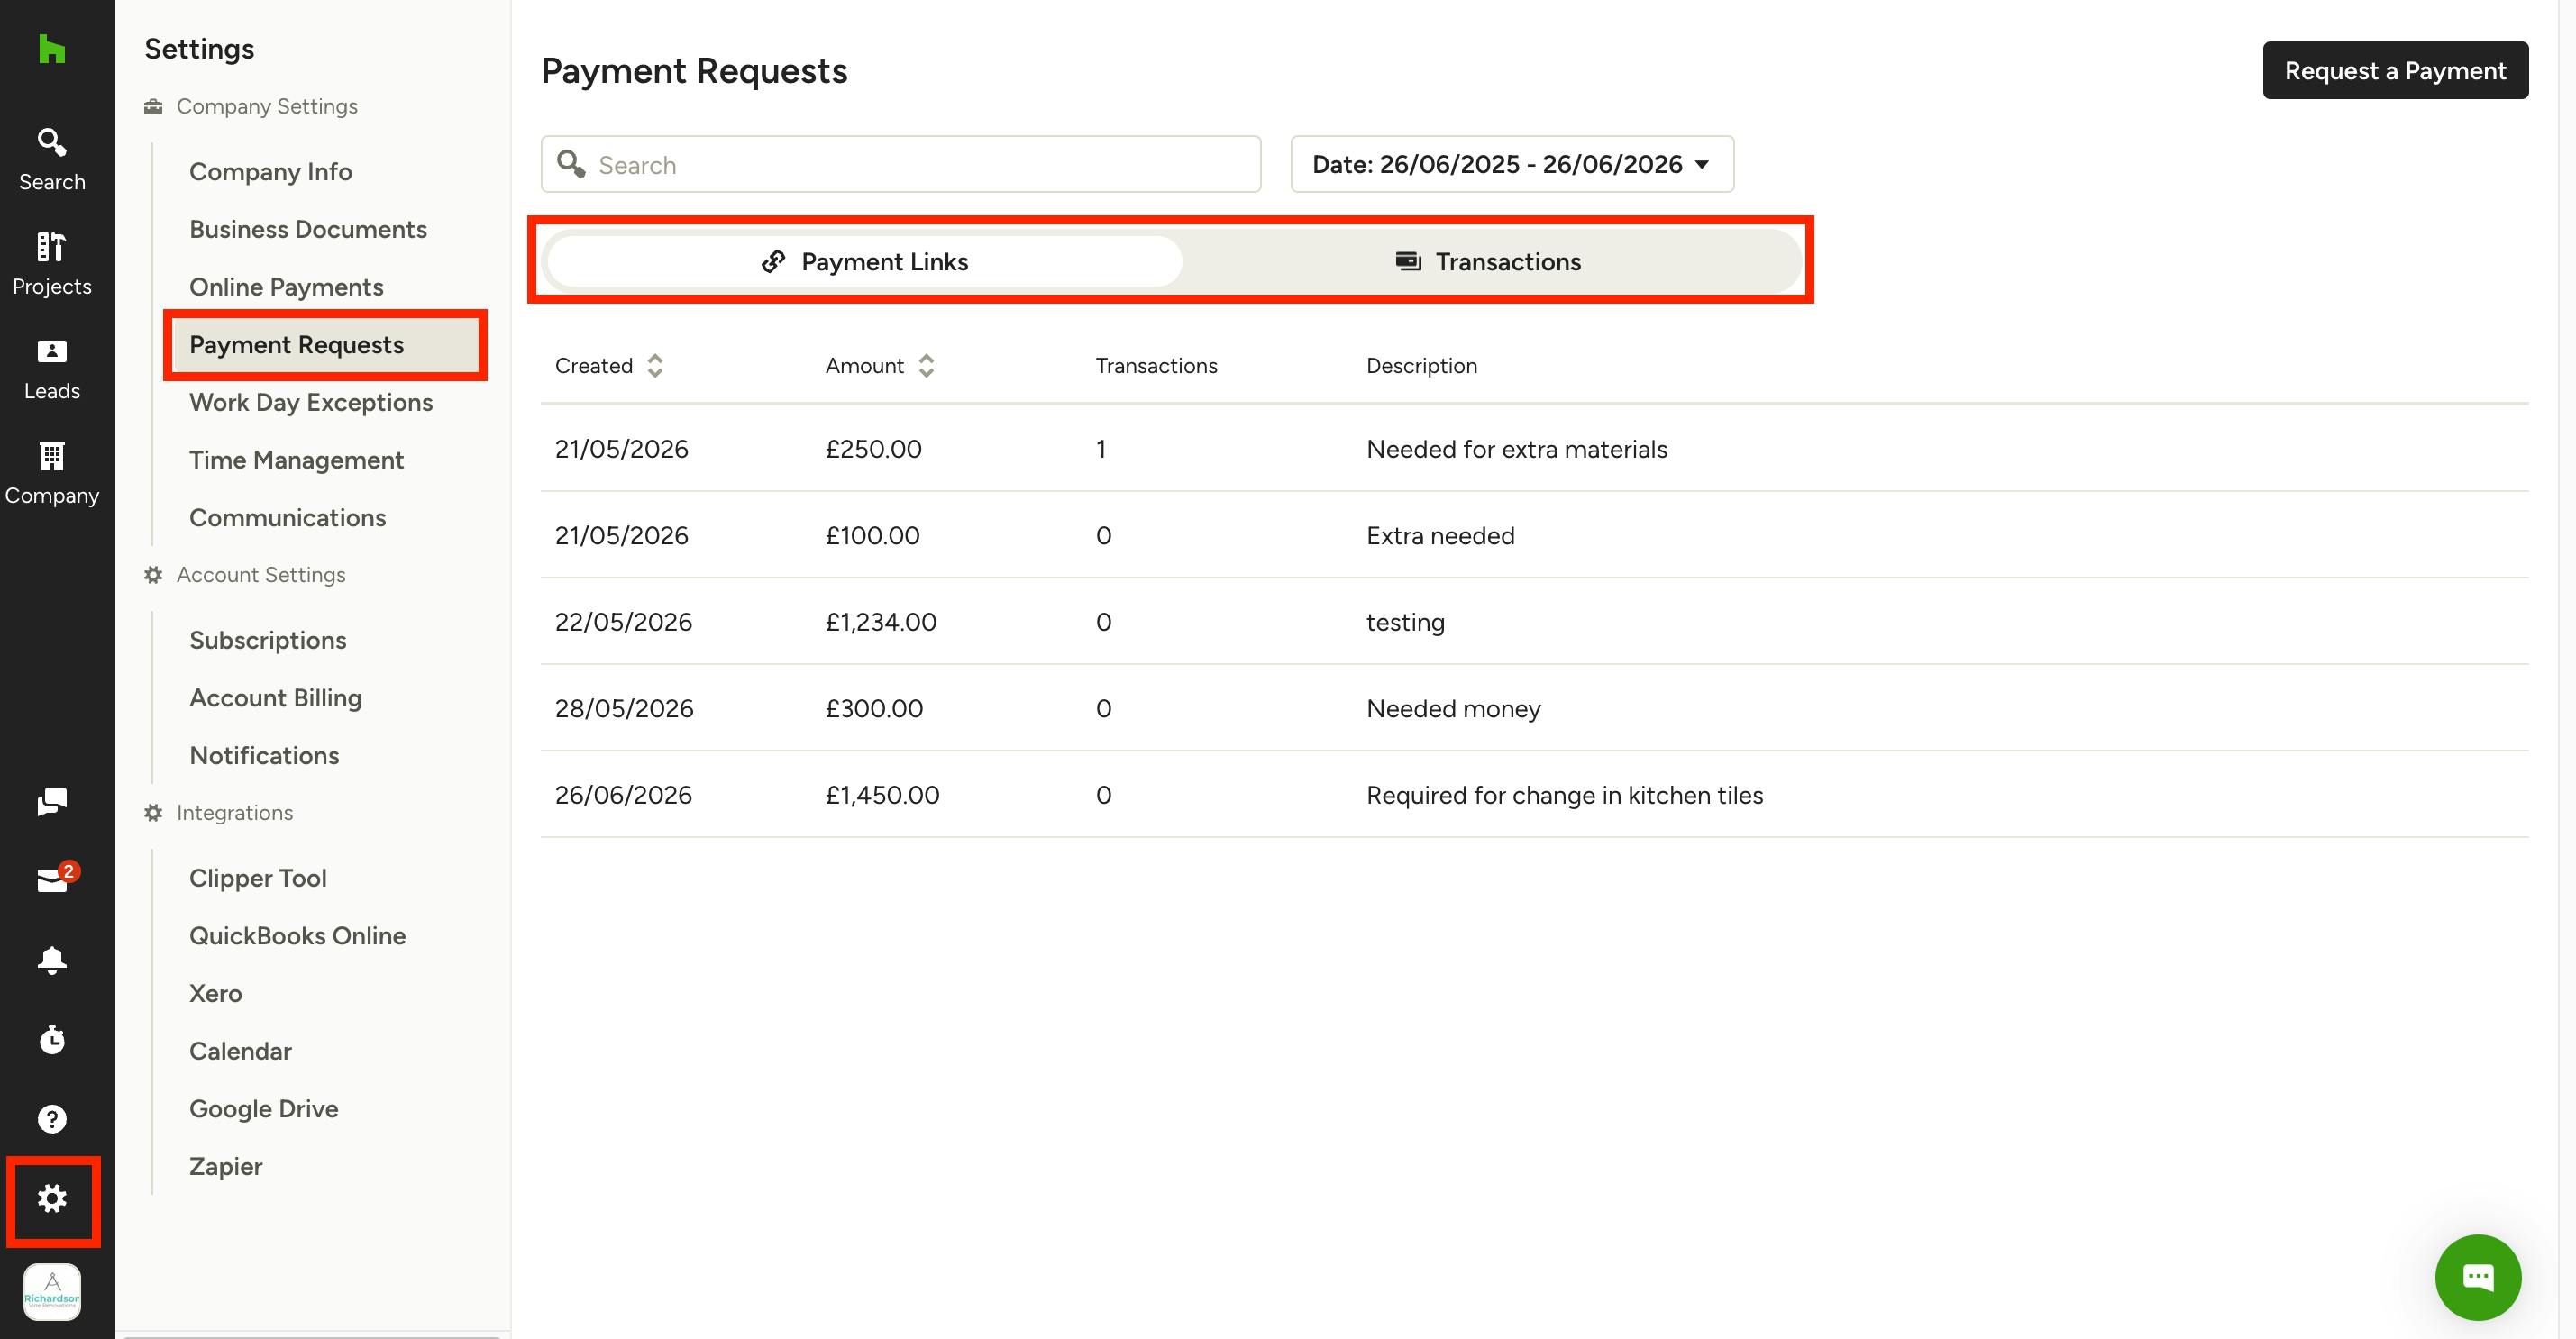
You can review and monitor all your payment requests all in one place – just select the Settings icon in the left navigation, then click Payment Requests.
Here, you will see two tabs – Payment Links and Transactions.
- Payment Links displays all the links you have created through Payment Requests. You can view the amount requested, number of transactions, and the description (as shown below).
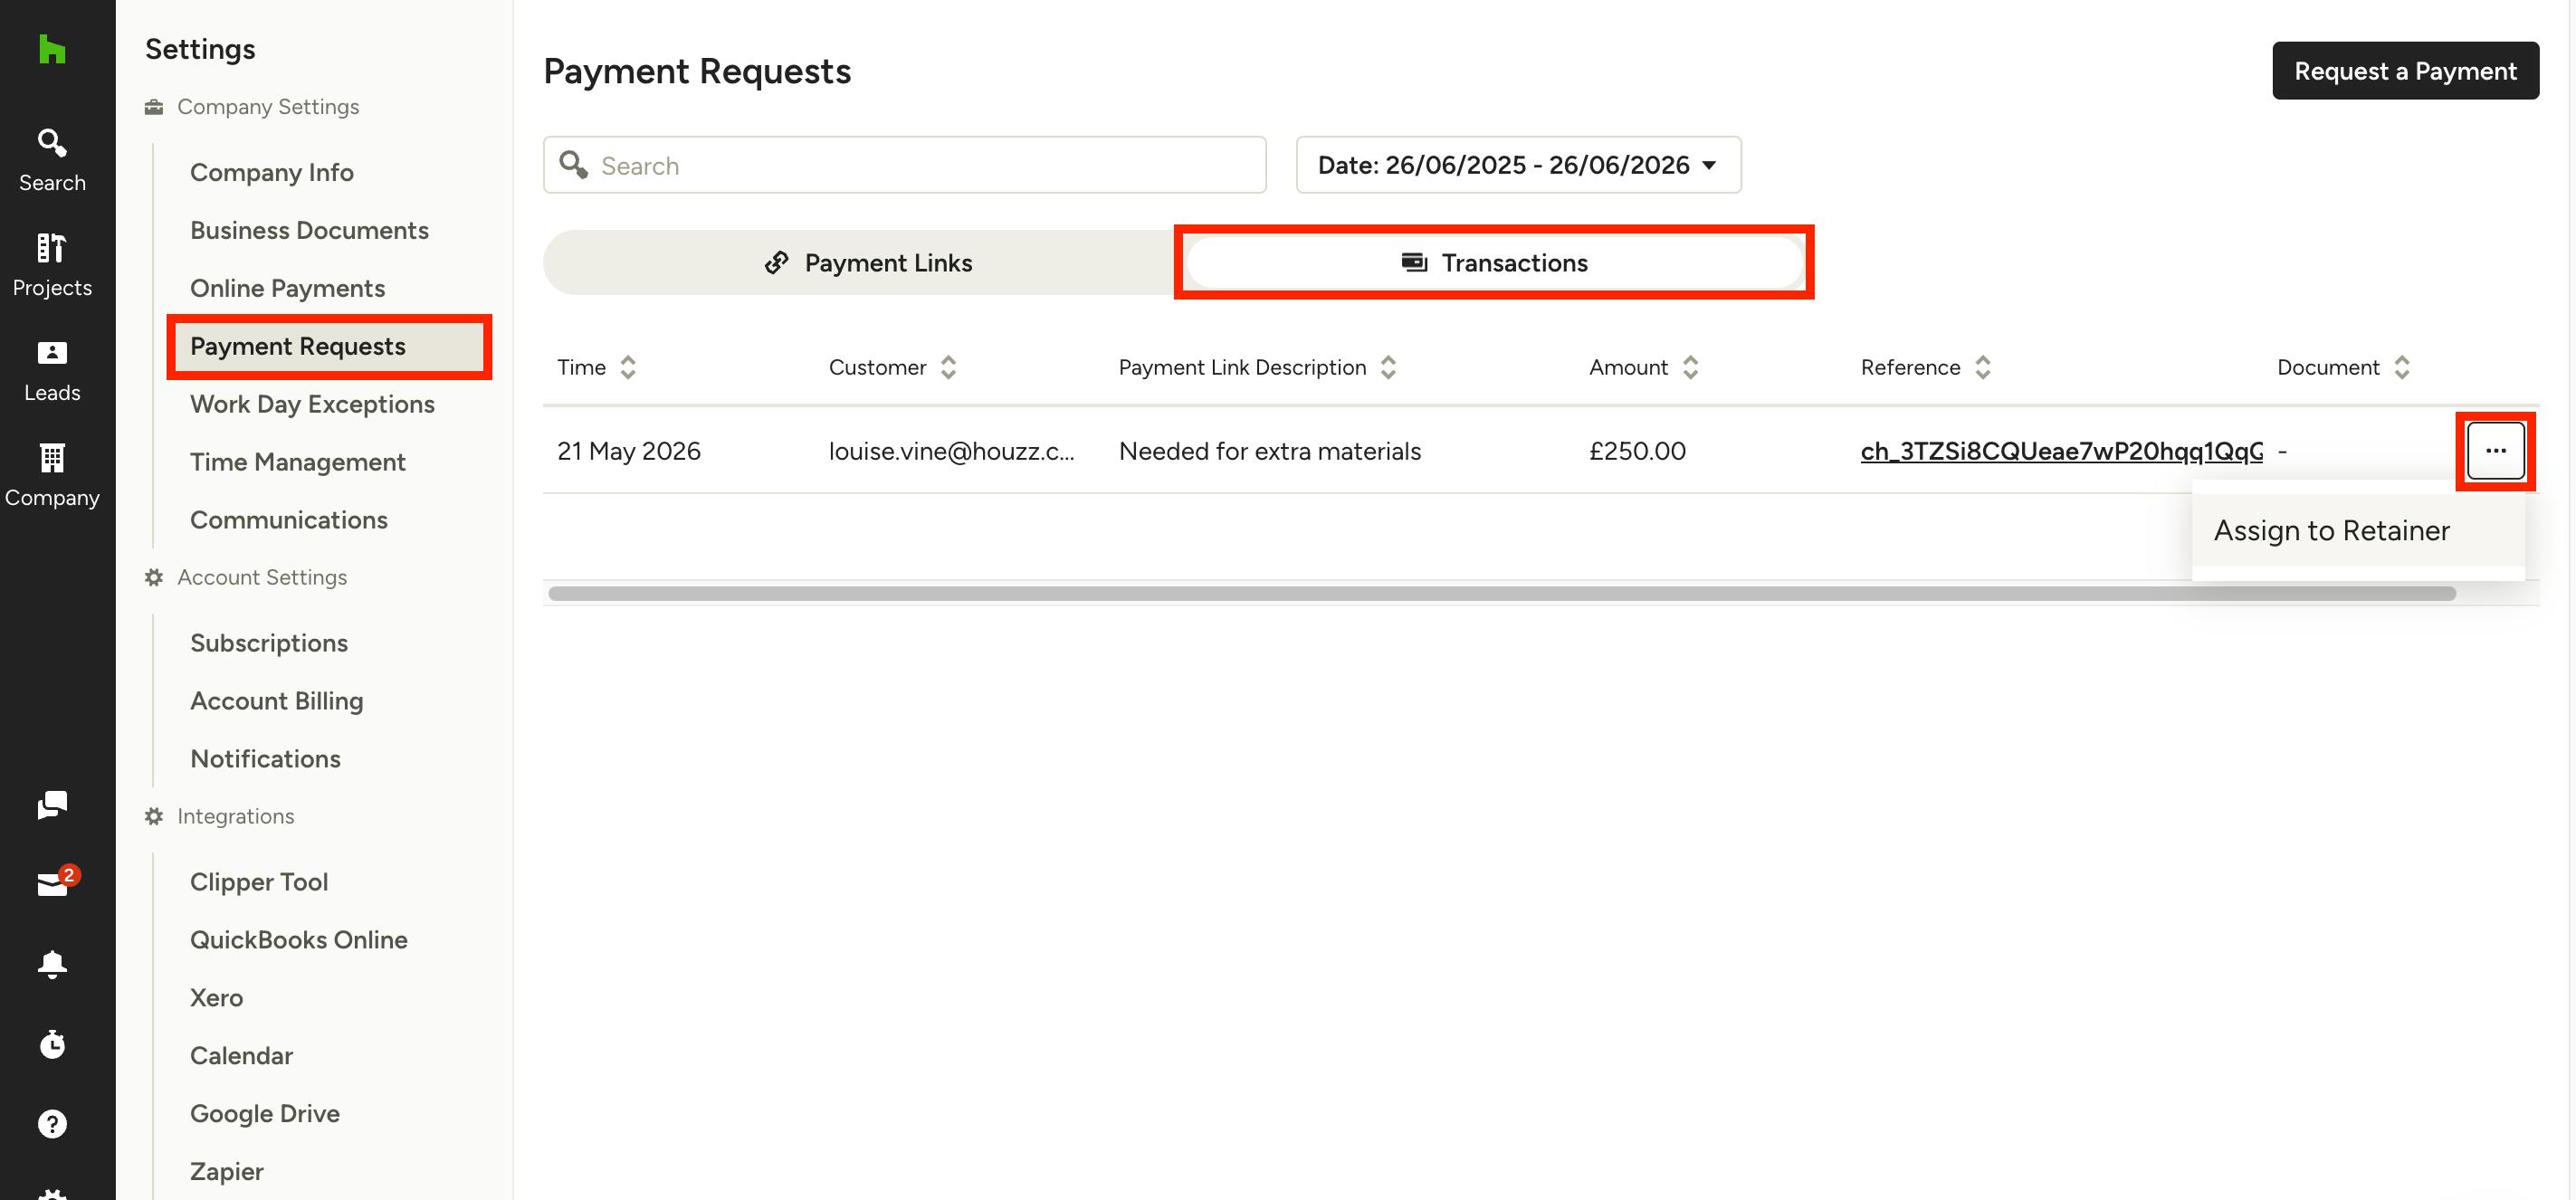
- Transactions display specific details of actual successful payments, including the timestamp, client email, payment link description, amount, reference ID, and attached document.
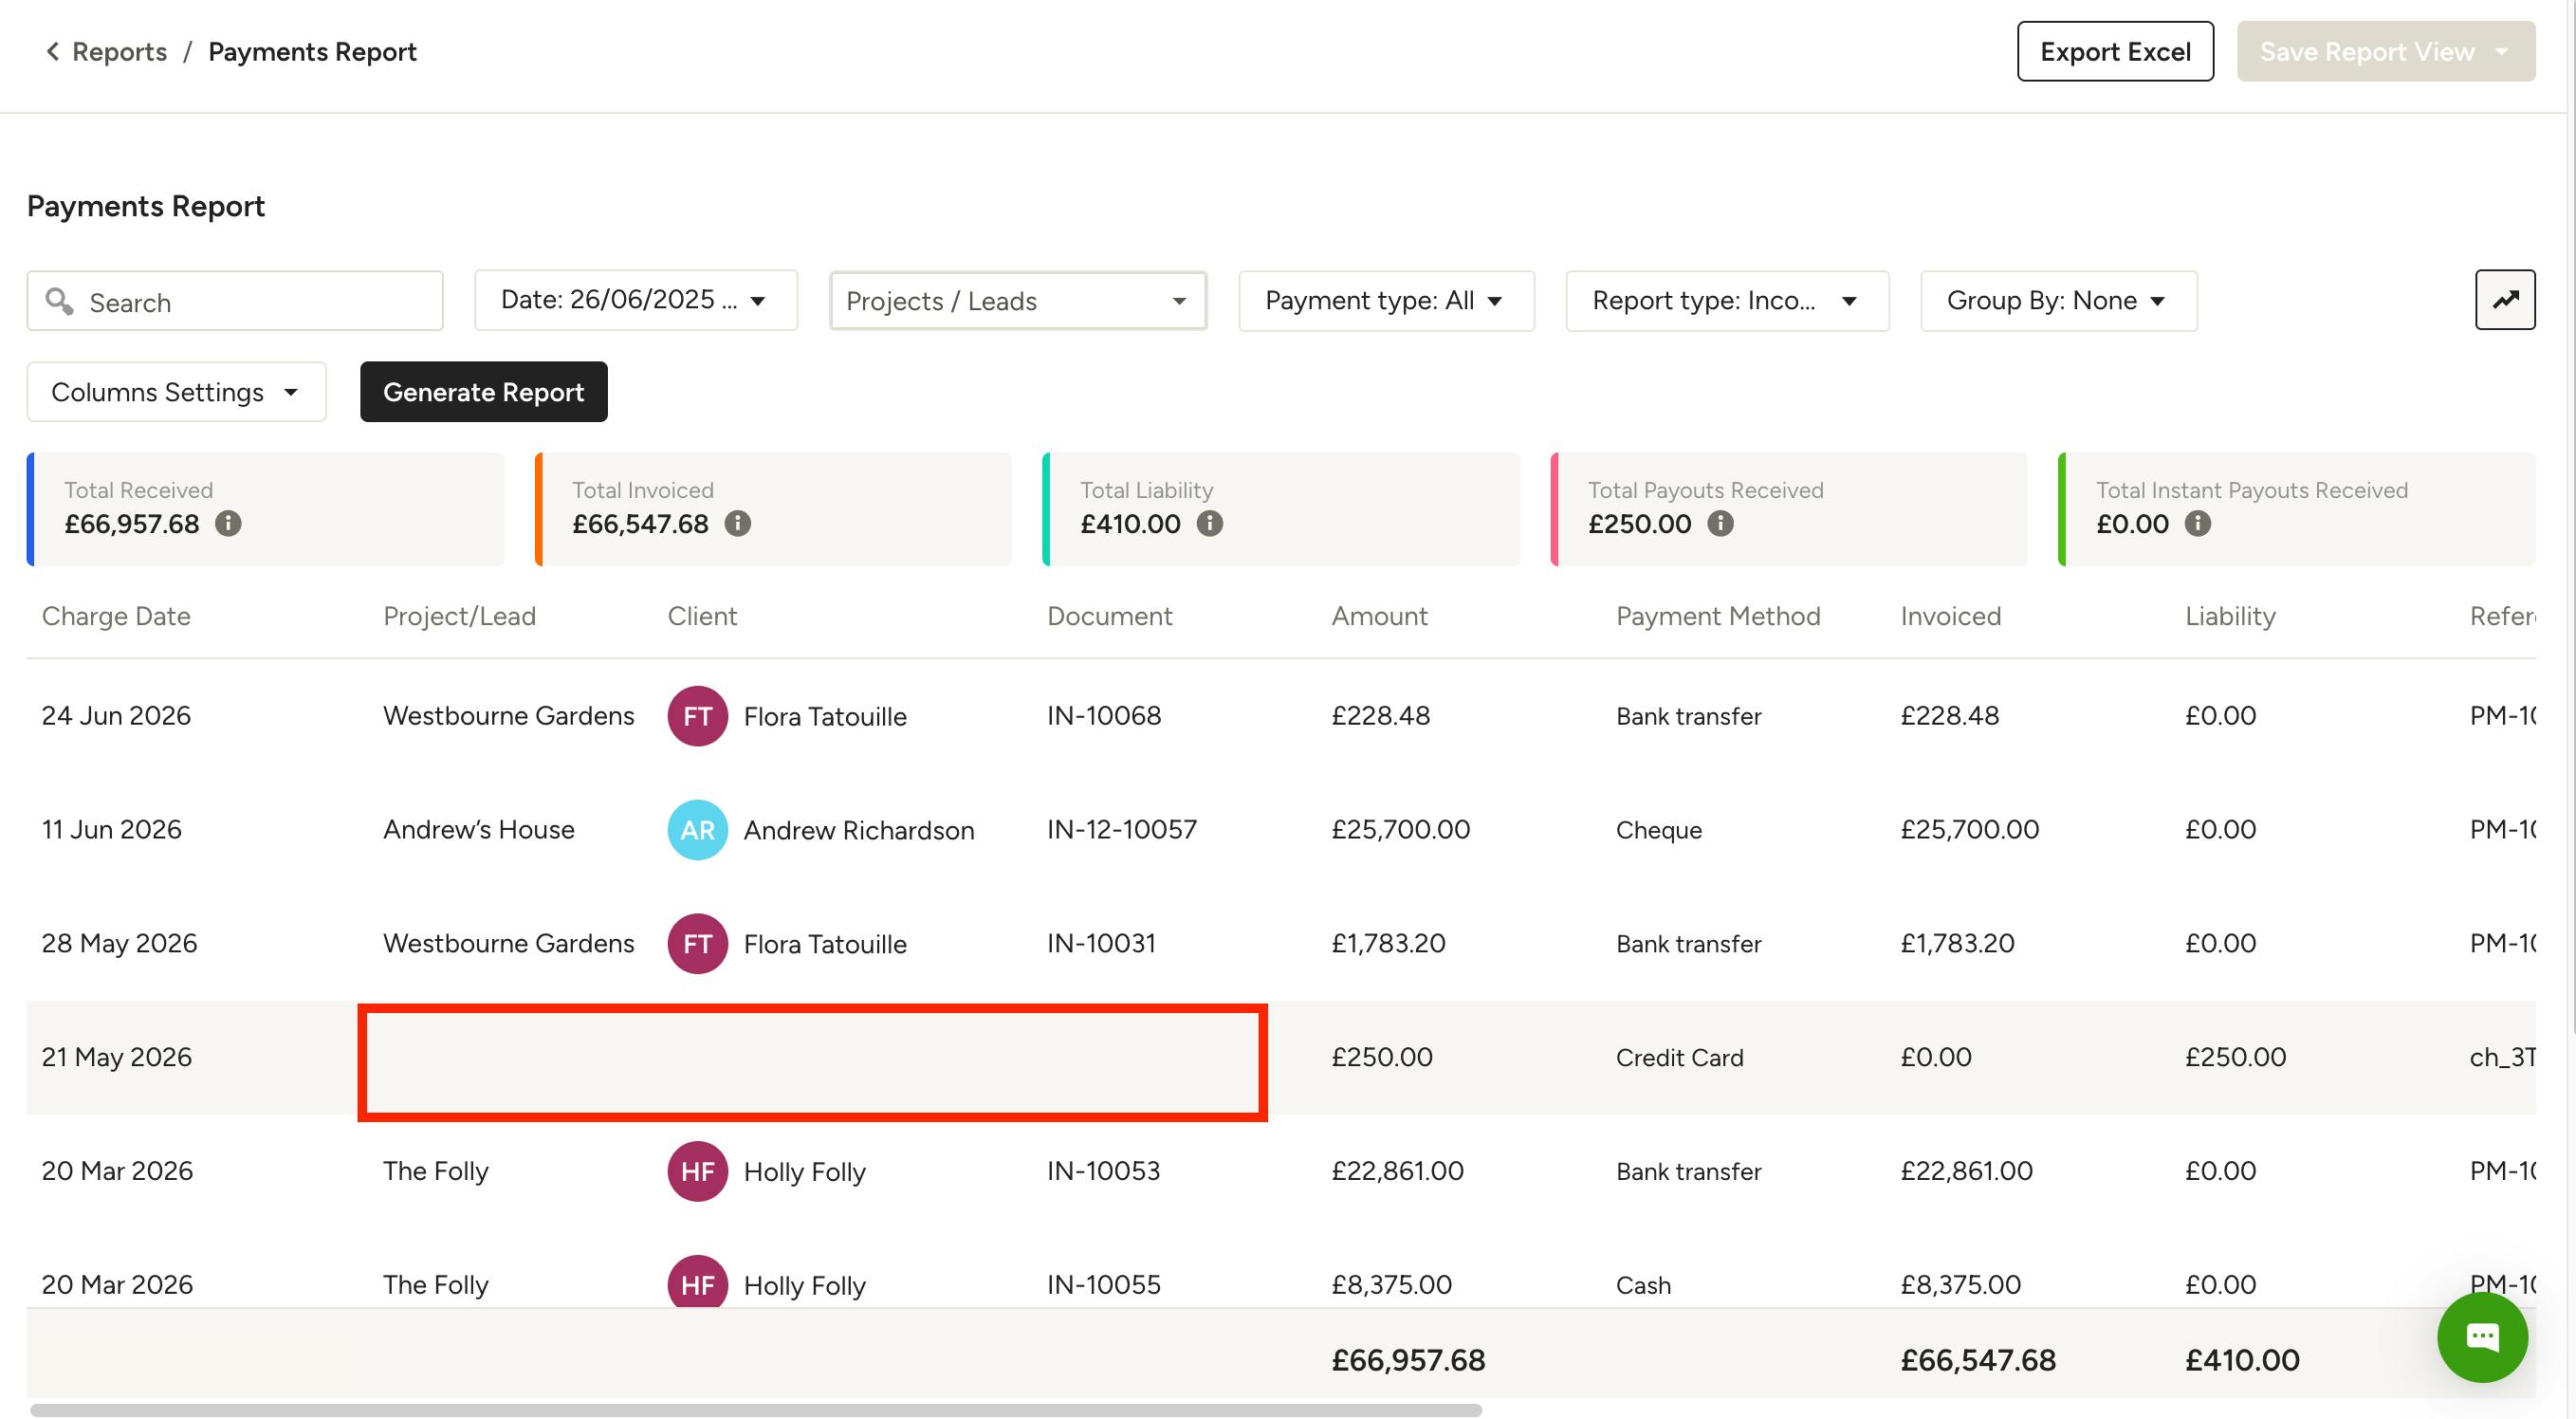
Once a payment link turns into a transaction, you will be able to see it under the Payments Report (as shown below). The transaction will not show project, client or document details until they are assigned.
To learn more about what is included in the Payments Report, read How to Generate Payments Reports.
Assign Payment to Document
Once a payment is successfully received, you can convert it to a retainer, which can then be applied as payment on financial documents.
Within the Payment Requests page, select the Transactions tab, then find the relevant transaction. Click the three dots icon on the right side of that payment, then select Assign to Retainer.
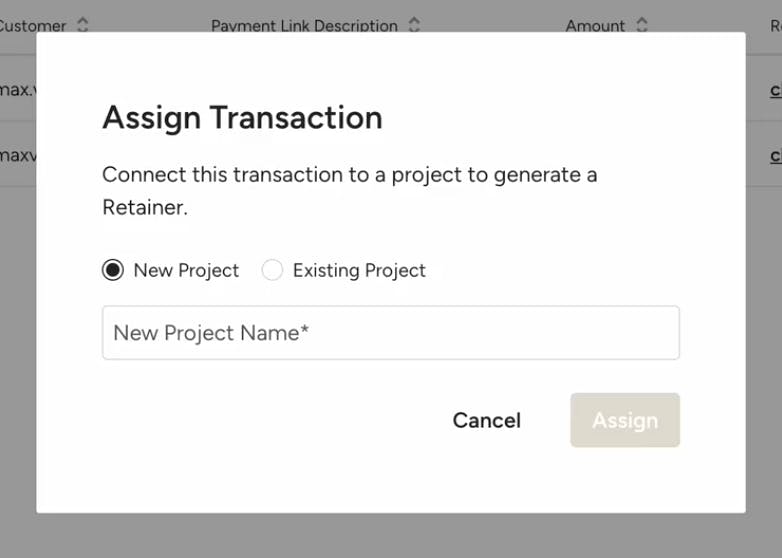
Select to link it to a New Project or to an Existing Project in the dropdown menu. Click Assign once complete.
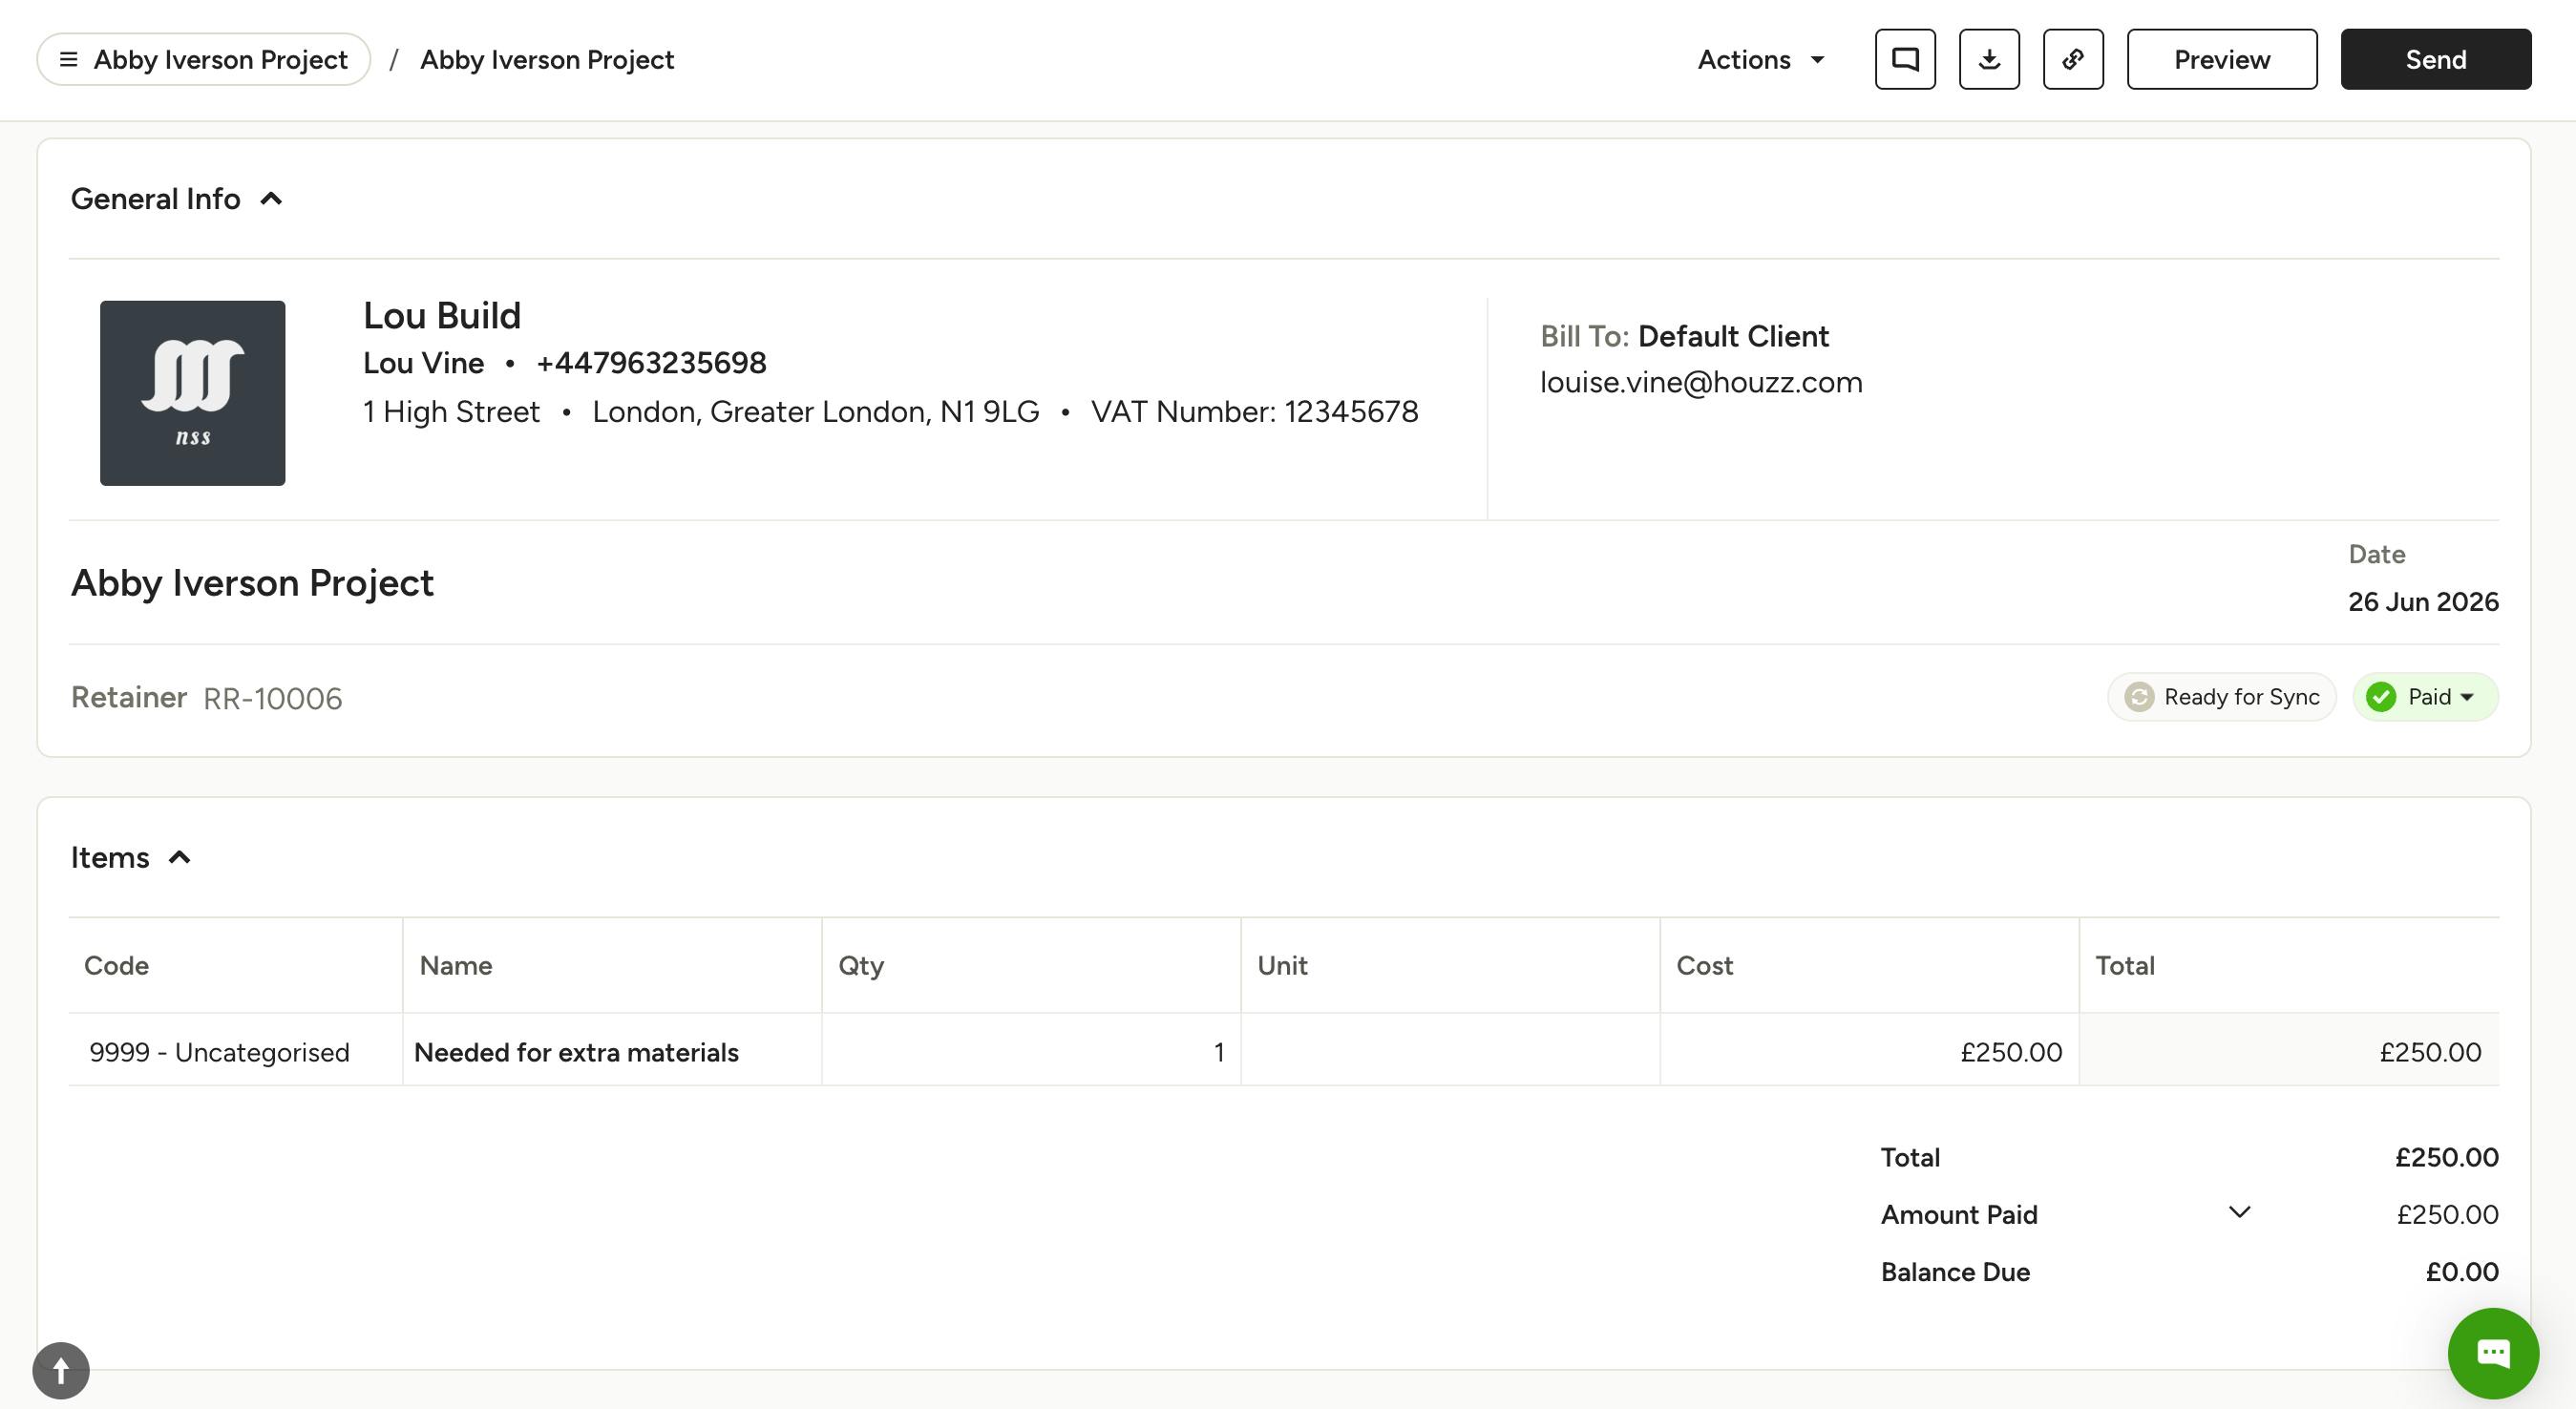
This automatically creates a new retainer that is marked as Paid (as shown below).
You can then apply this to new or existing financial documents, as outlined in How to Create and Apply Retainers.
The document will now also show as connected to the transaction in both the Payment Requests and the Payments Report.