How to Edit Your Document Settings
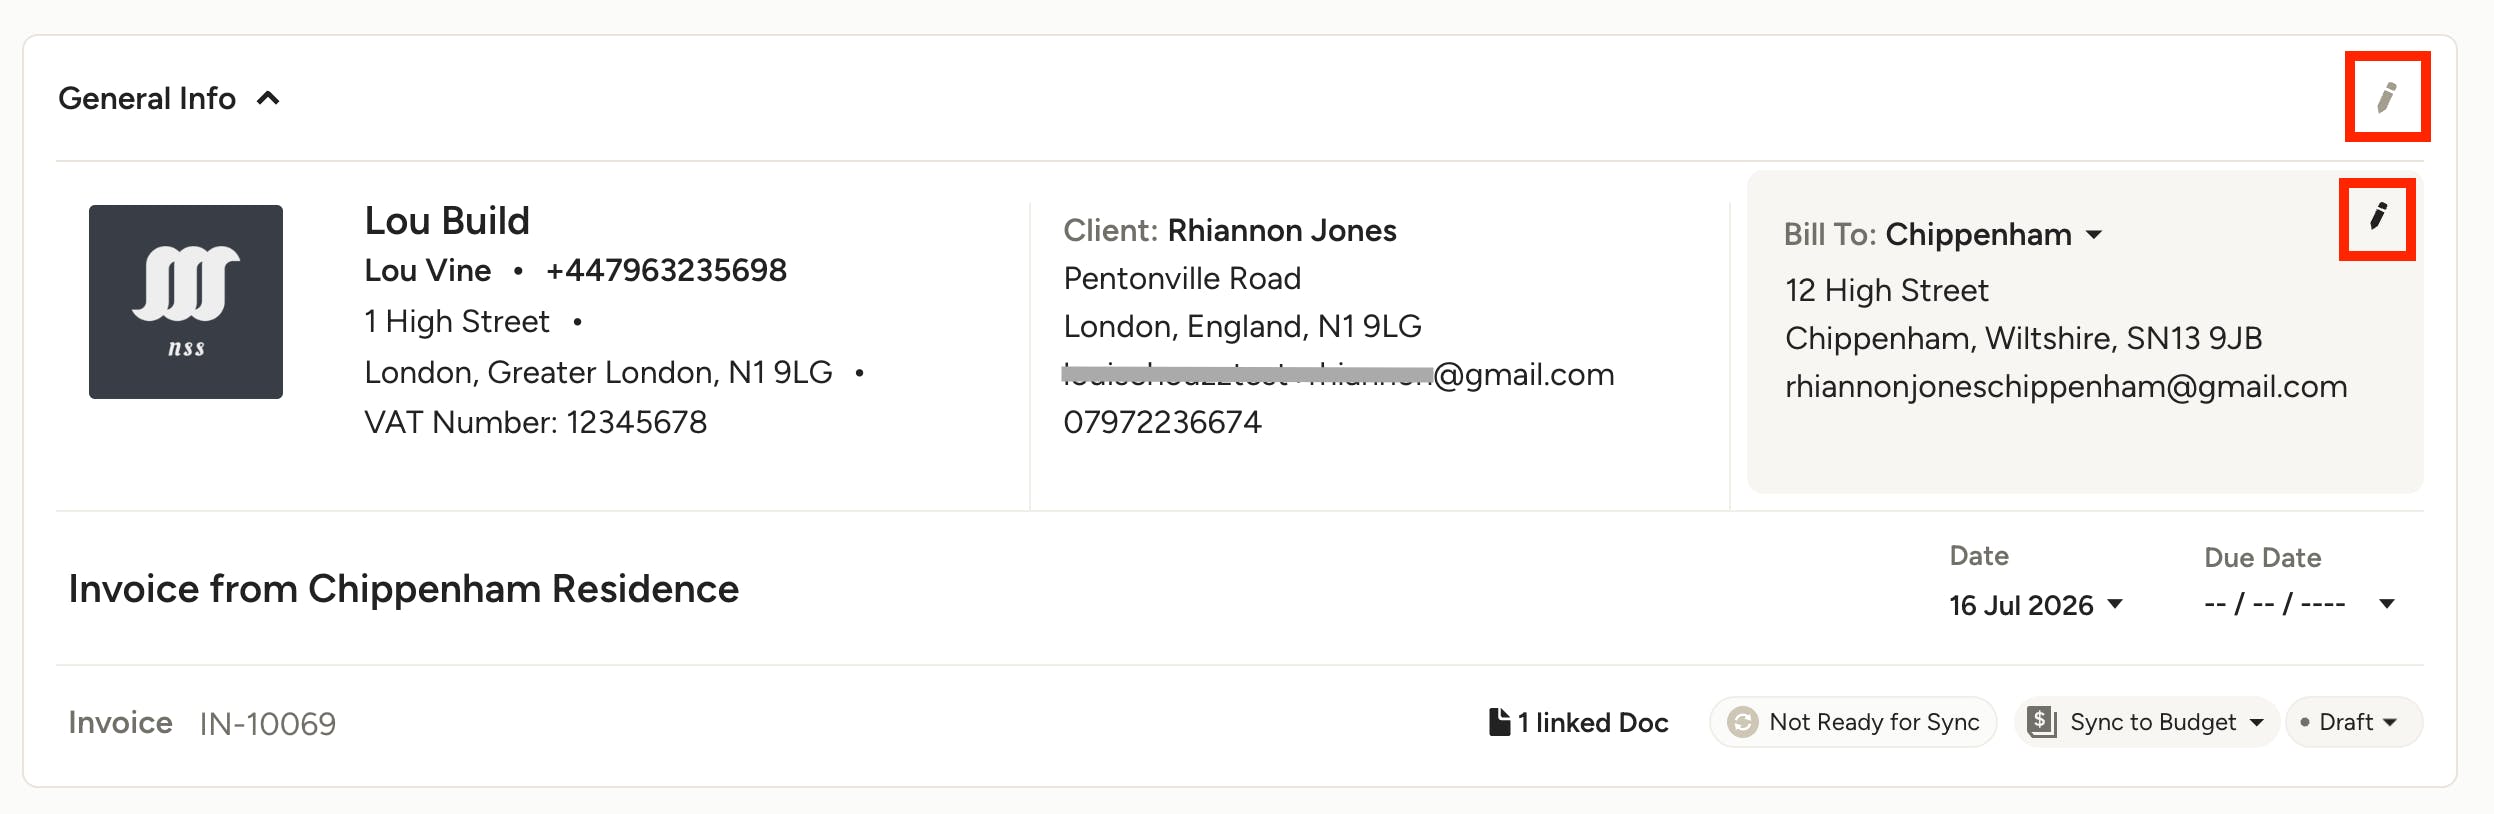
There are lots of ways to customise your documents on Houzz Pro. Here we’ll go through all the different settings available to edit in your documents so that you're able to run your business in the way that works best for you and your team.
Editing General Document Details
Need to update the document info, client and billing info, or company info? To view and edit all of the general document details in one place, click on the pencil icon in the top right of the General Info section.
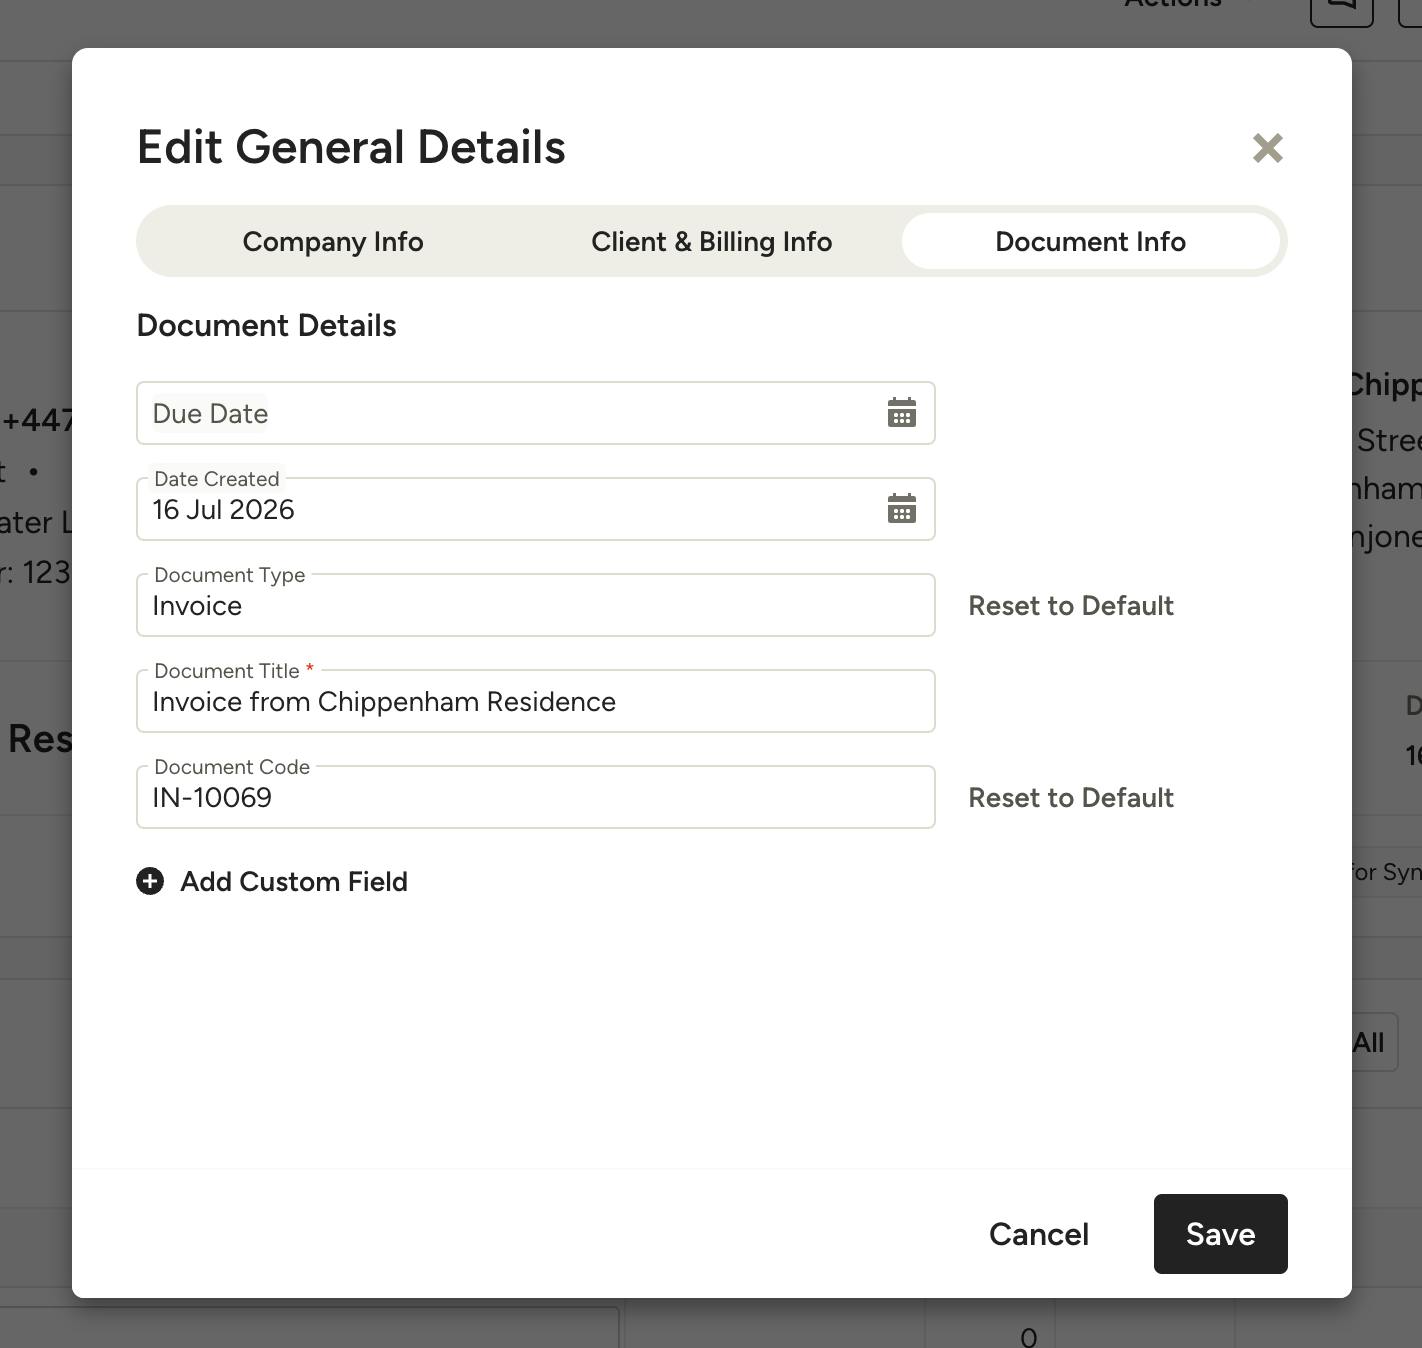
Here you will see three separate tabs for Company Info, Client & Billing Info and Document Info. Click the tab where you want to edit the details – make sure you click Save at the bottom when you're done making changes.
Company Info
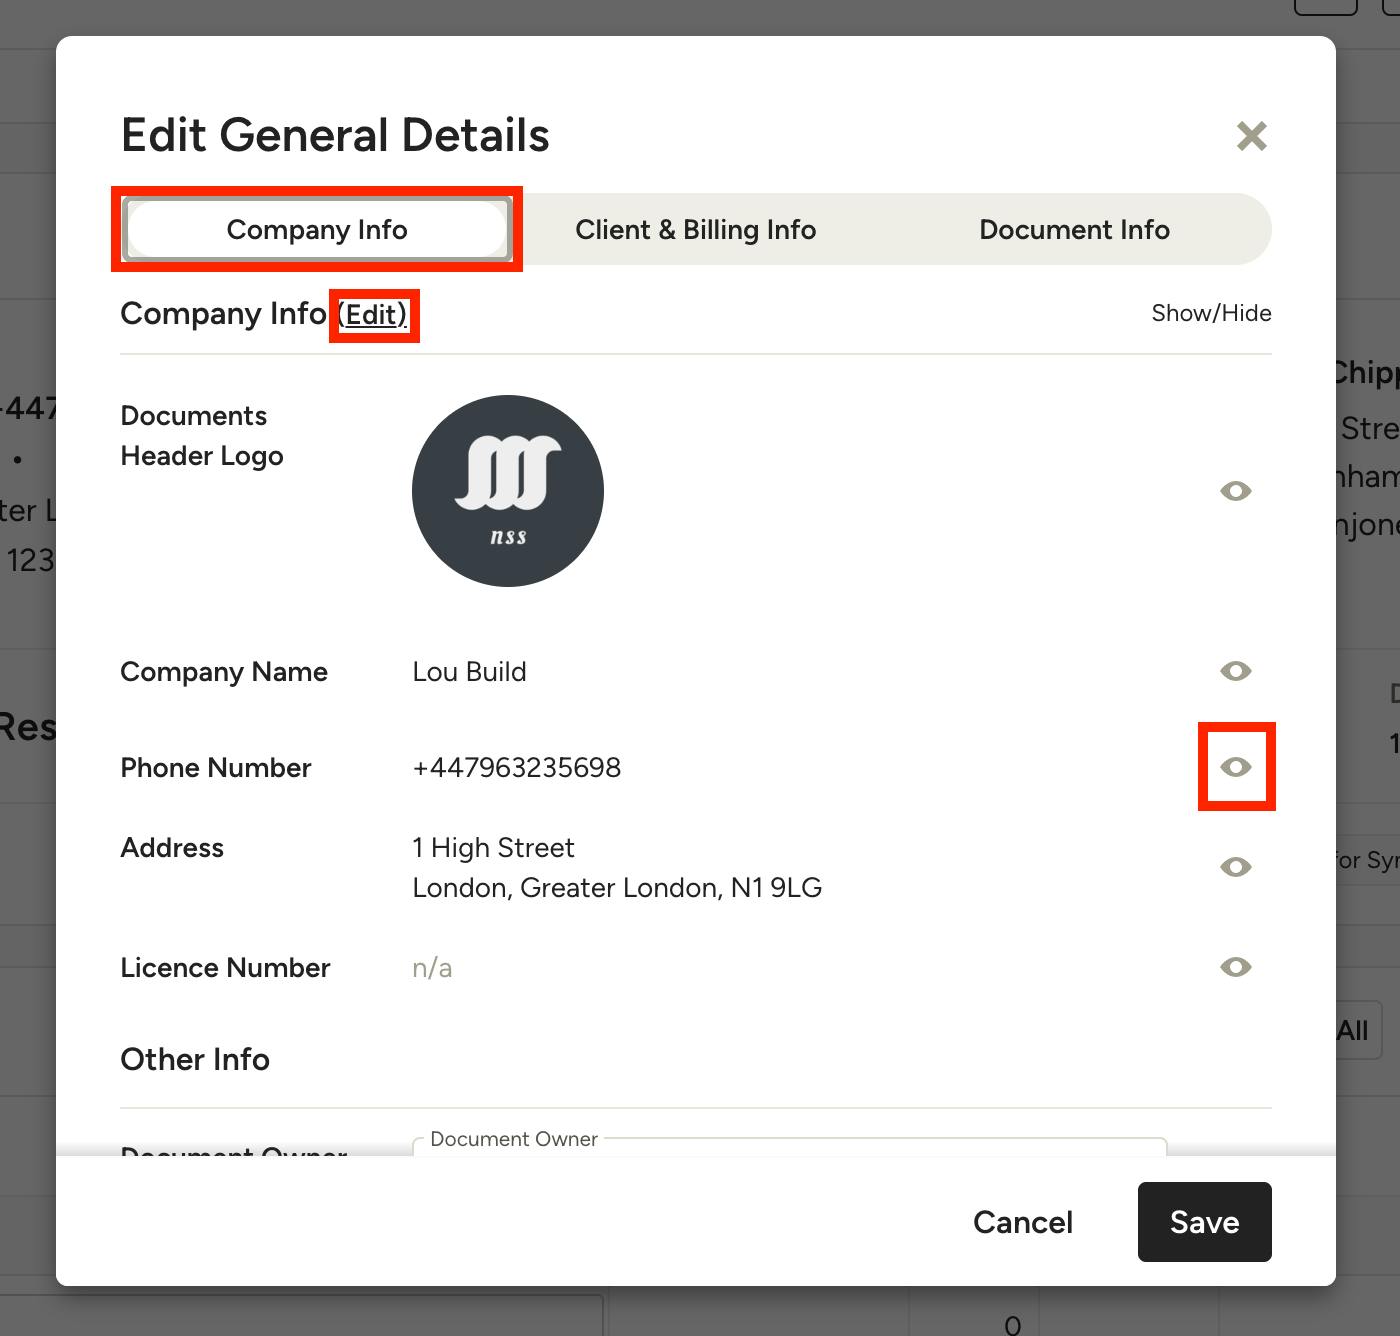
This tab allows you to show/hide your company info on the document, as well as set a document owner and bid limit. Note that your company info (name, phone number, address, licence number etc.) is reflected across all documents and must be edited from the Company Info page in your Settings section. Click Edit towards the top of the tab to be taken to your settings to make changes. Learn more in How to Update Your Company Address.
To hide certain aspects of your company info, click the eye icon next to the information you wish to hide.
Documents Header Logo
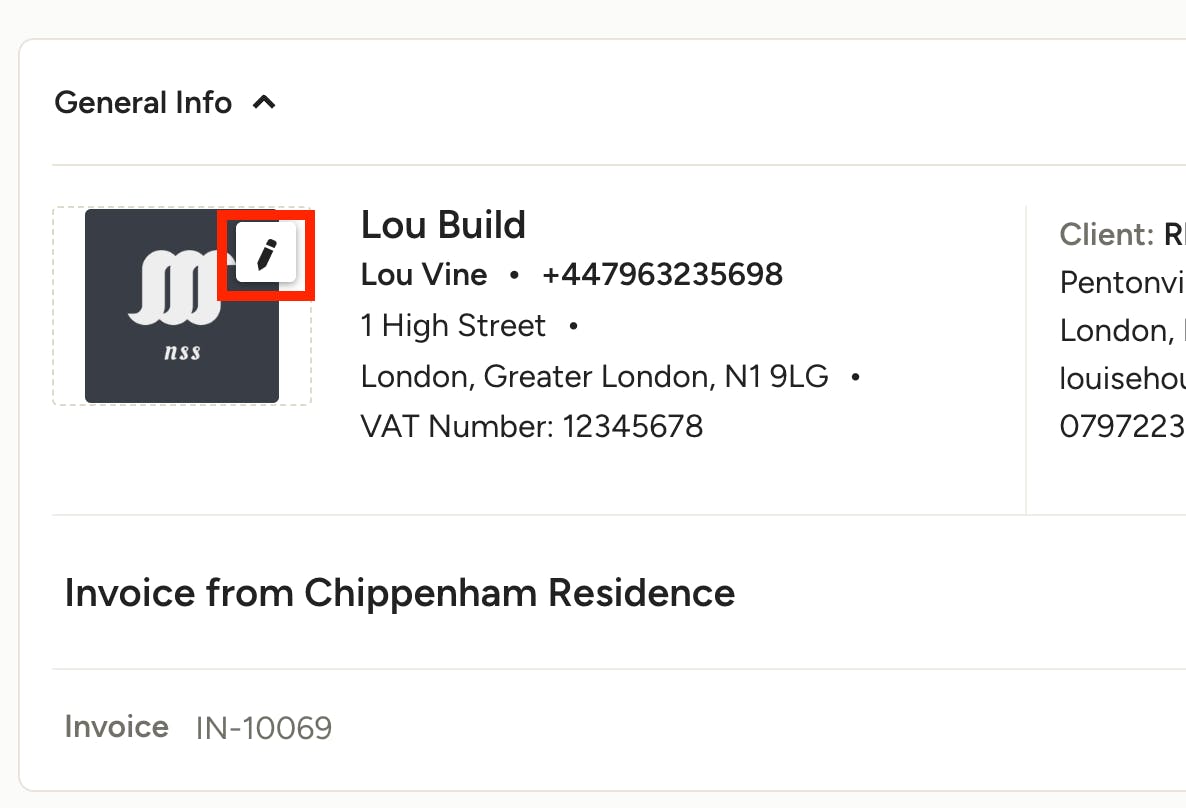
Change your documents header logo directly from any document by clicking the Edit icon when hovering over your logo. Select the file you want to upload from your device and the logo will be updated instantly.
Note: Changing your logo on a document will change the logo across all documents. Learn more about your different logo types in How to Add Your Logo in Houzz Pro.
Document Info
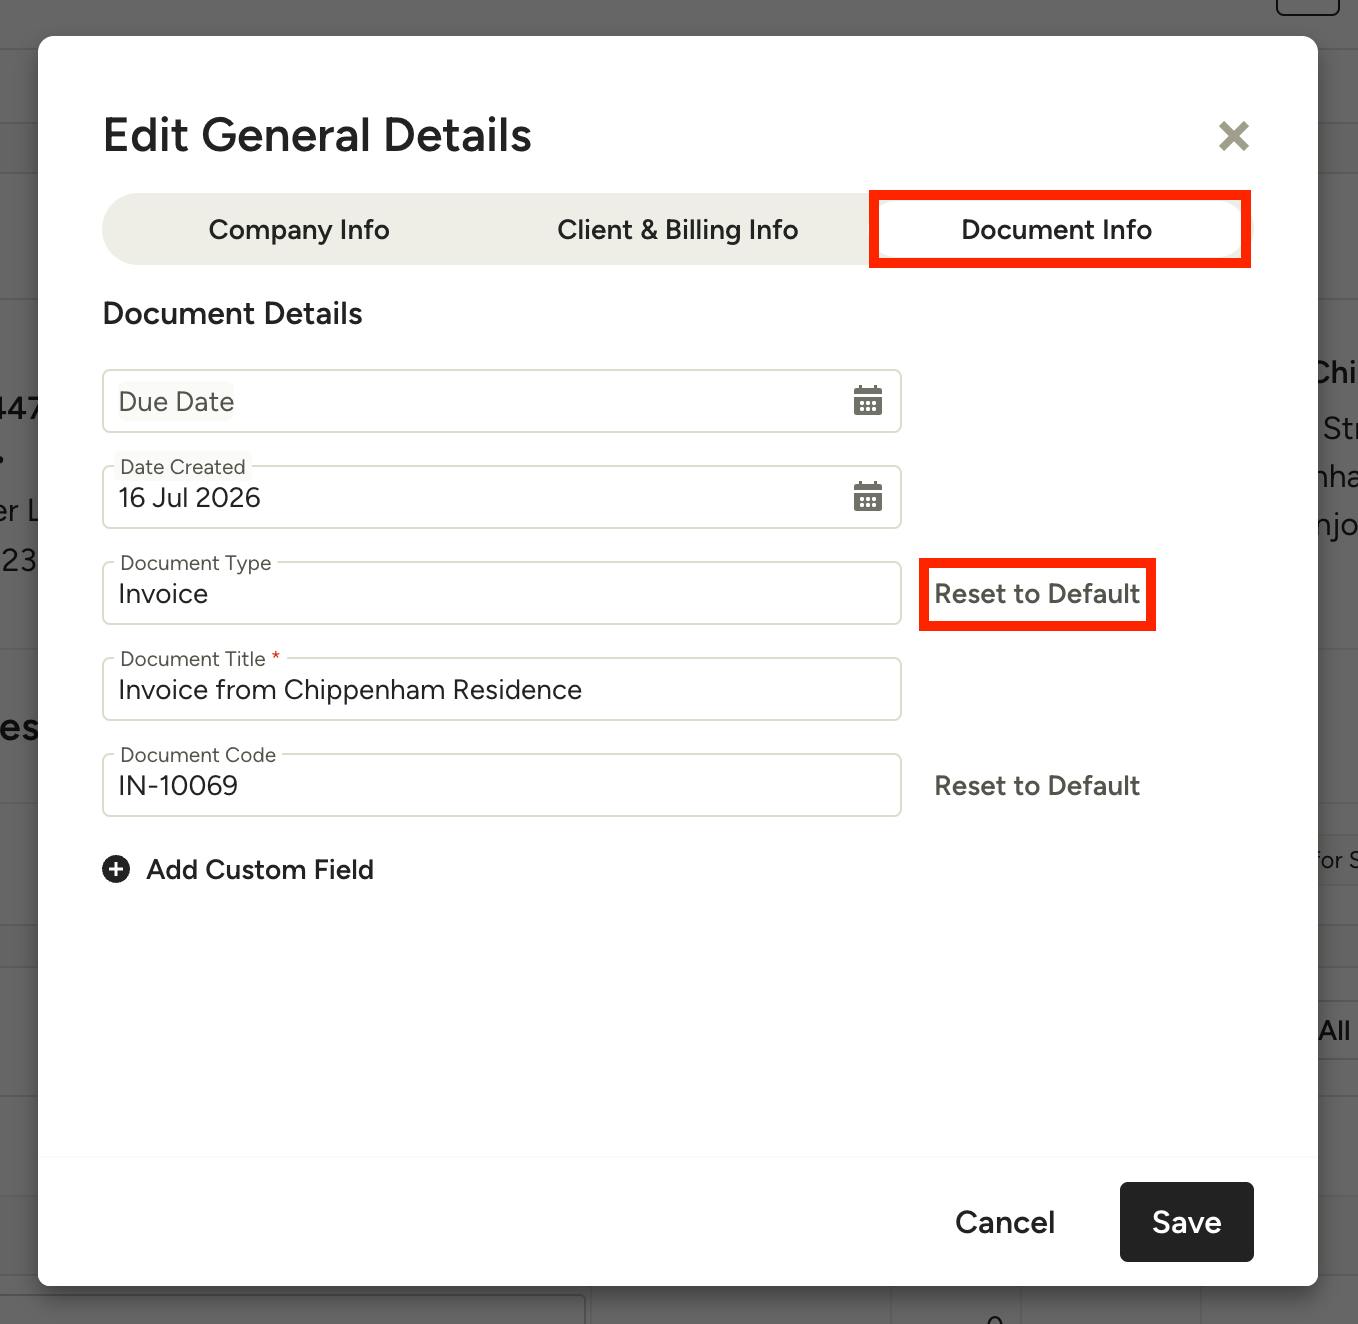
This tab lets you set elements specific to the document, including Due Date, Date Created, Document Type, Document Title, Document Code and custom fields. Note that Document Type and Document Code can be reset to their default inputs by clicking the option next to each one.
Learn more about Document Codes and Creation Date in the respective sections below in this article.
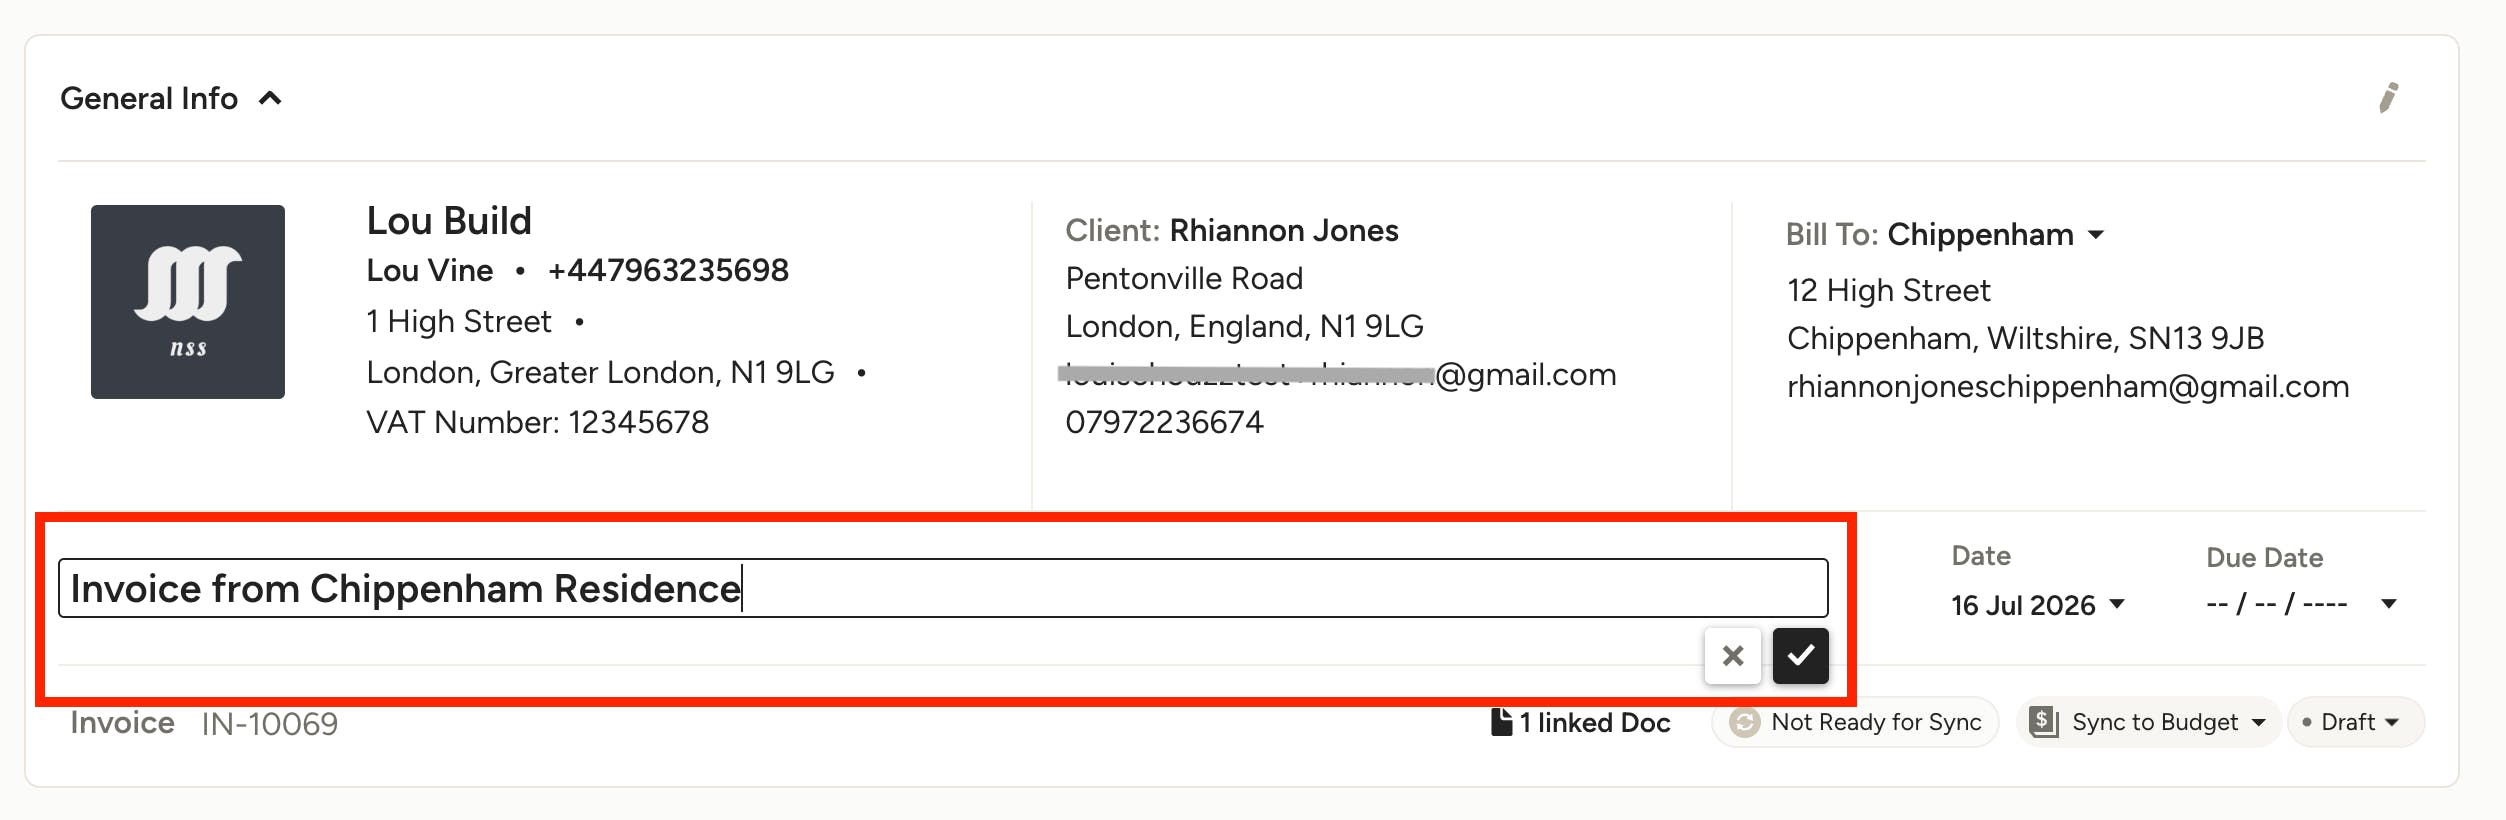
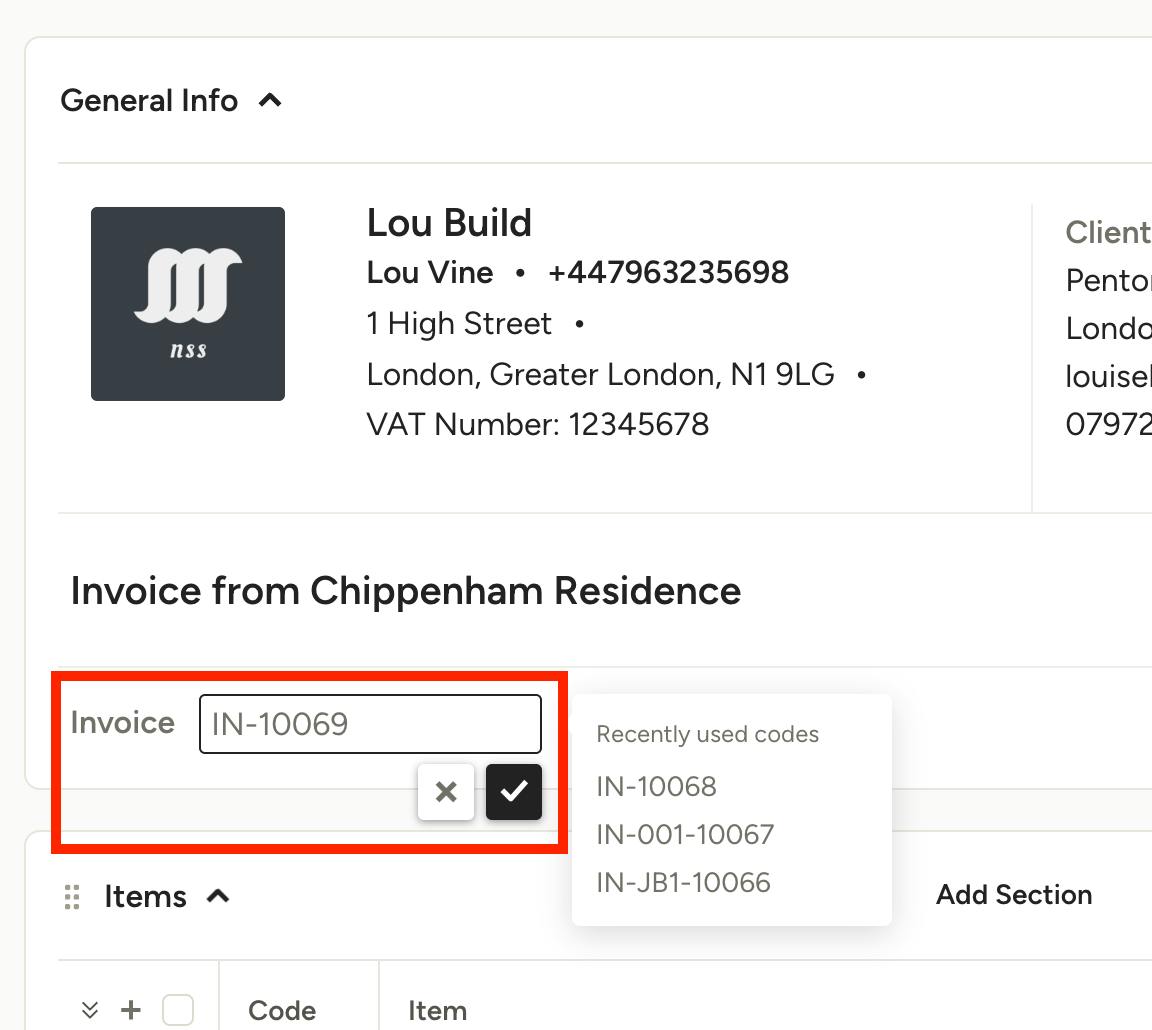
You can also edit the document title, type and code without opening the general info settings just by clicking on the element you want to change, typing your adjustments, then clicking the tick mark icon to save the changes.
Custom Fields
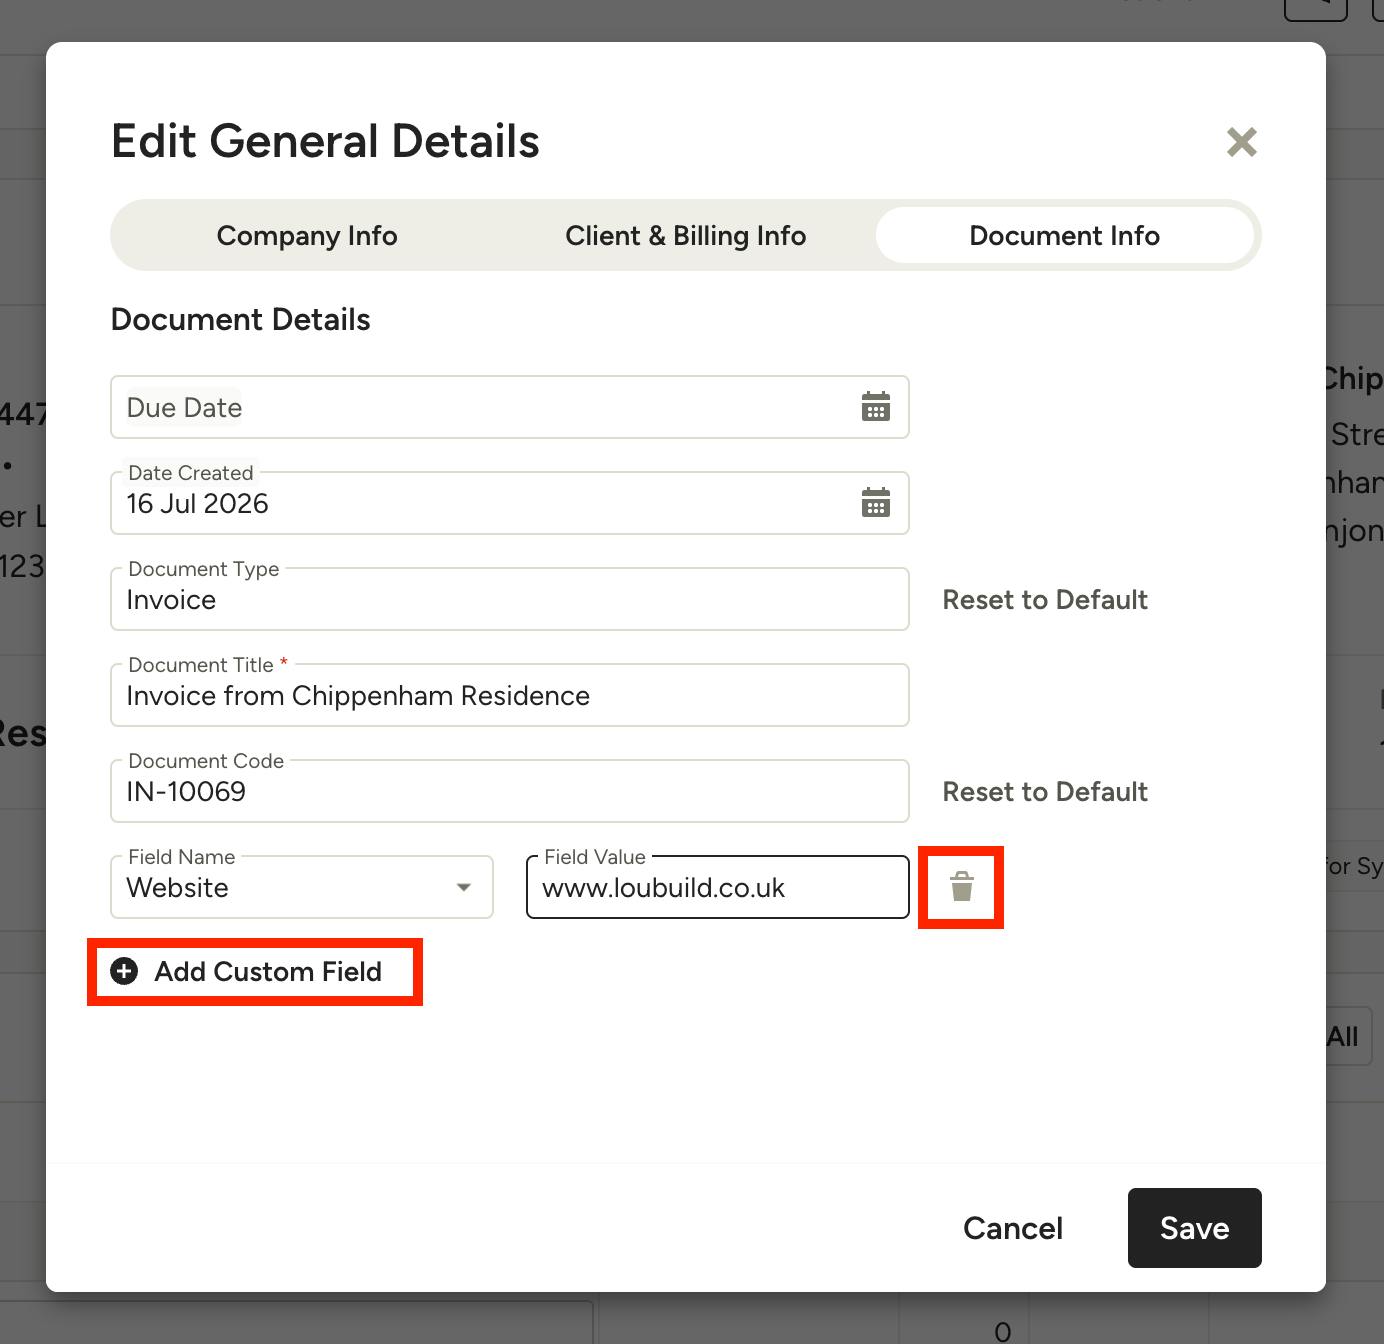
Add a custom field to your Company Info or Document Info sections, such as website, email or social media link, by clicking Add Another Field at the bottom of the relevant tab and filling in the details. You can choose to add a clickable link or a free text field. To remove a custom field, click the bin icon next to it.
Client & Billing Info
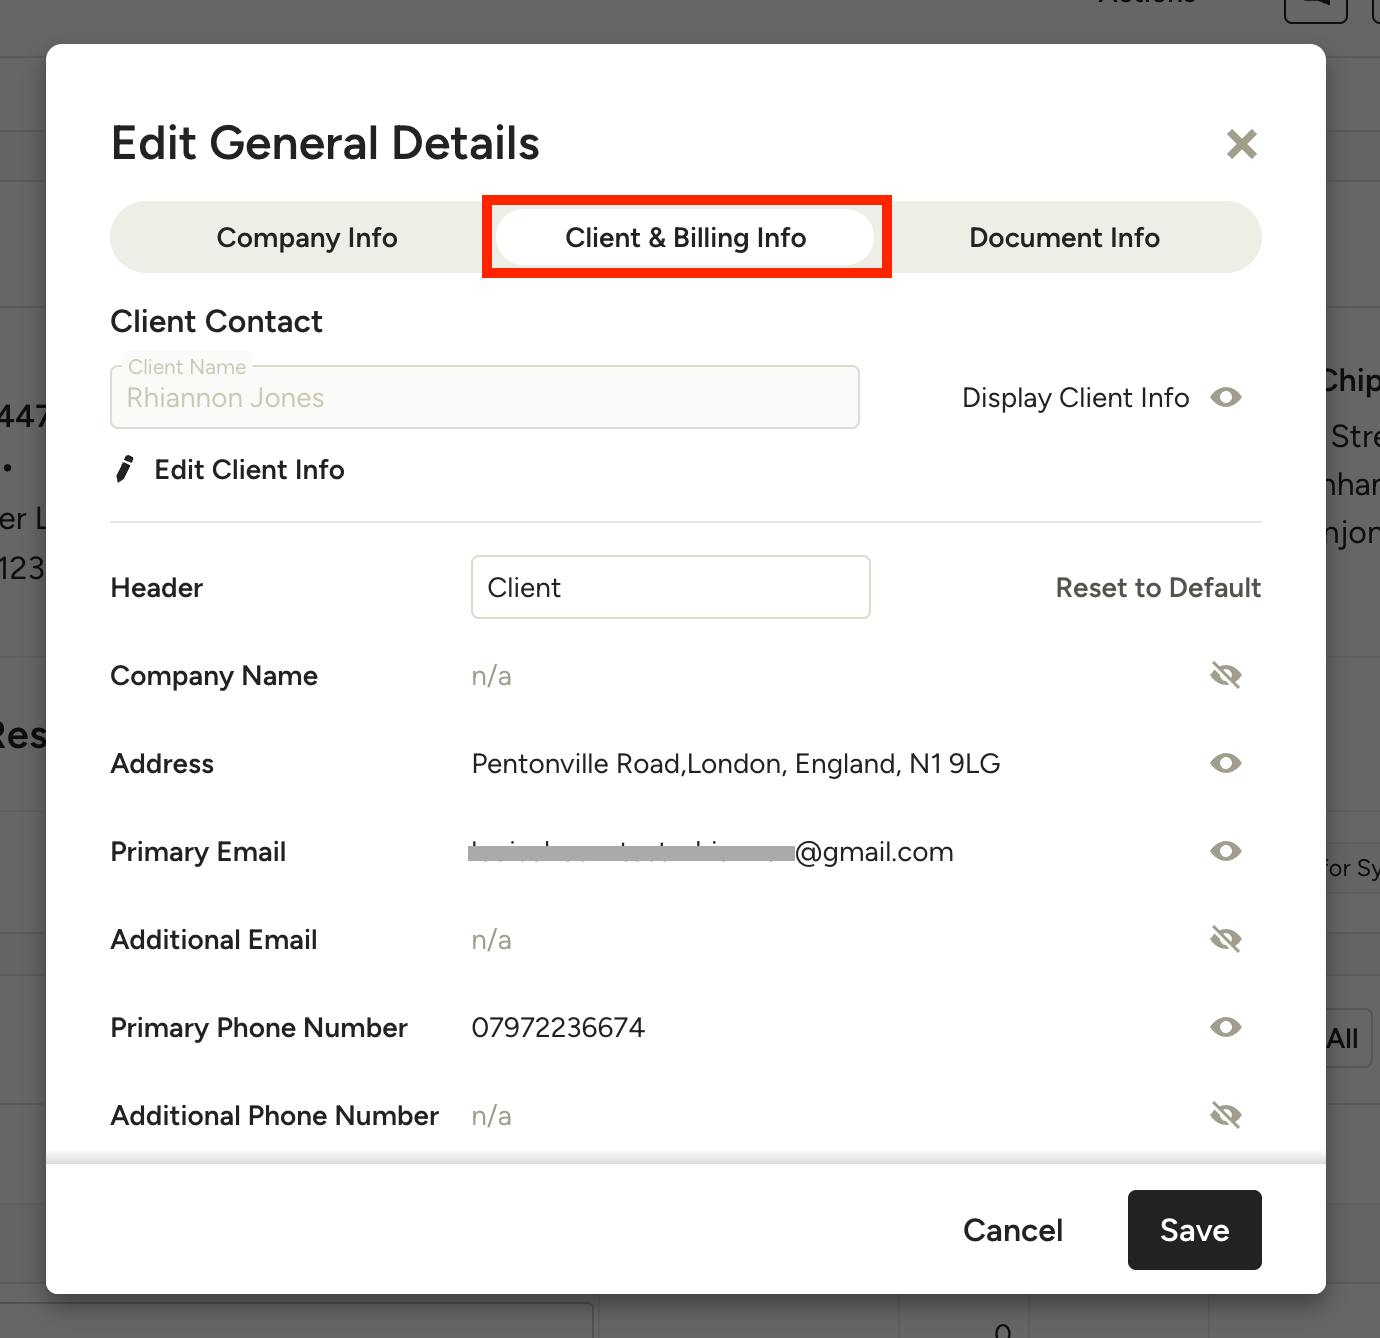
The Client & Billing Info tab give you complete control over which address(es), email(s) and phone number(s) are displayed on the document. You can choose to show/hide client details and add separate billing or shipping addresses, with the ability to apply changes to all linked documents or confine the changes to the current document. Learn more about using multiple addresses in How to Add Multiple Addresses for a Project.
Editing Document Codes
Document codes (ex: IN-10017) are automatically assigned based on the document type (ES, PR, IN, PO etc) and the order in which the document was created in your account (1001, 1002 etc). You can customise the document code on each individual document, but any future documents will generate their code based on the system defaults.
If you have added a project code to a project (available in your project details), it will be automatically added to the document code by default (ex: IN-BL-10017). Project codes help you to quickly decipher which project your document(s) is associated with when viewing them across the Houzz Pro platform.
To edit a document code, you can open the General Info settings and change it under the Document Info tab, or you can edit it directly on the document and click the tick mark to save.
Editing a Document's Creation Date
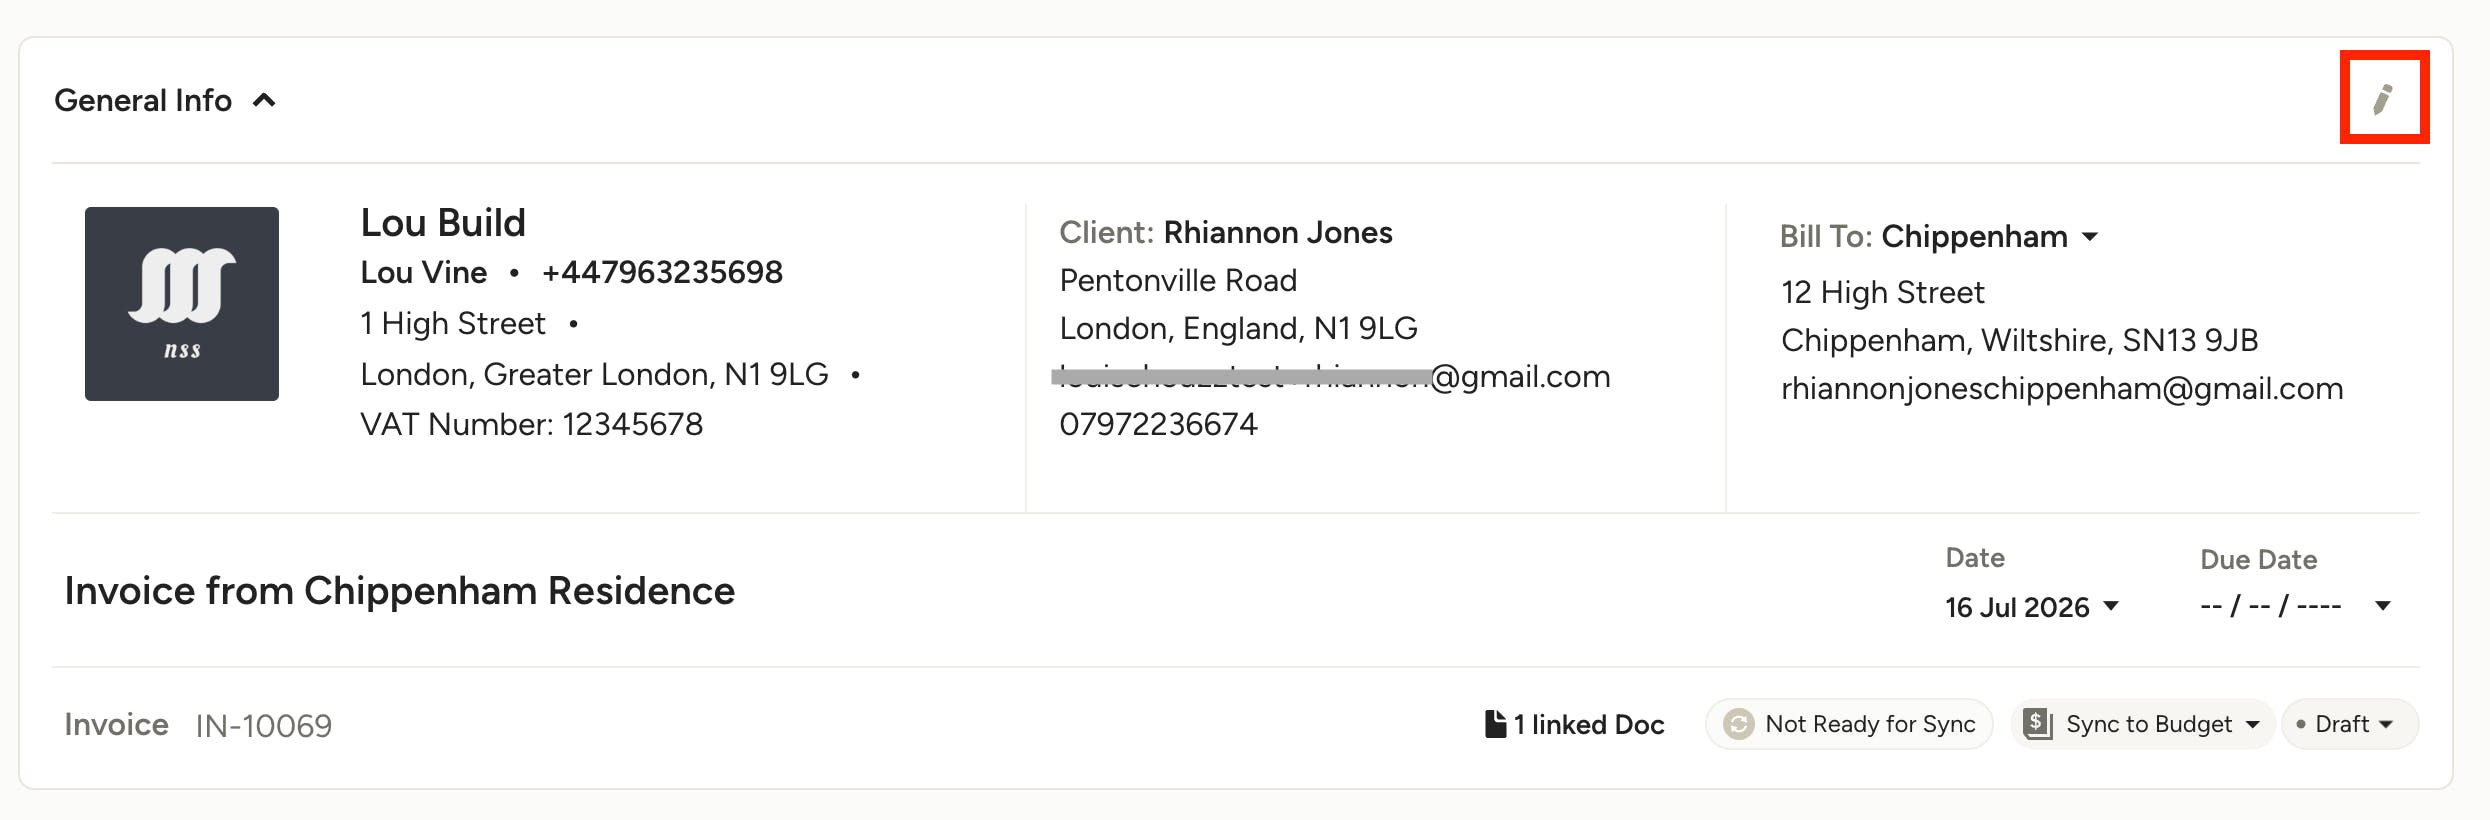
You can personalise your document creation date, giving you complete control over your accounting and document presentation. To edit a document's creation date, first click the pencil icon in the top right of the General Info section.
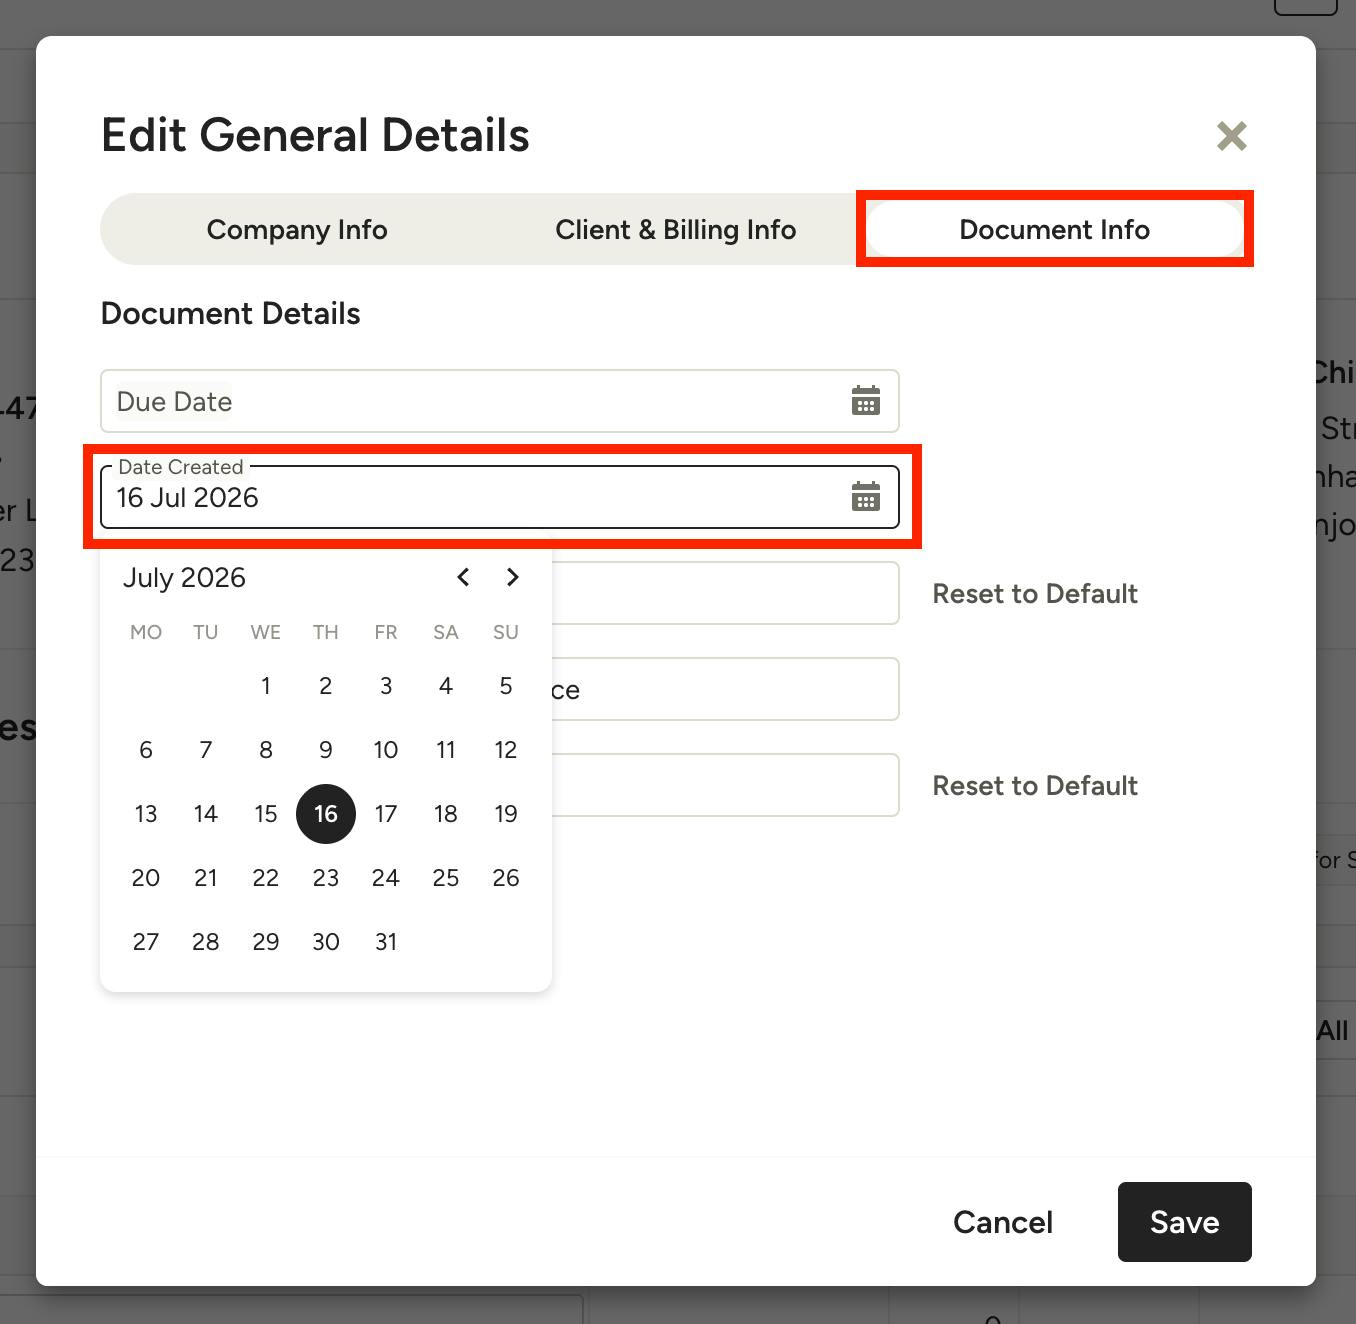
In the modal that opens, find the Date Created field under the Document Info tab and click on it to bring up a calendar where you can select the desired date. Click Save to submit your change(s).
Editing Payment Schedules
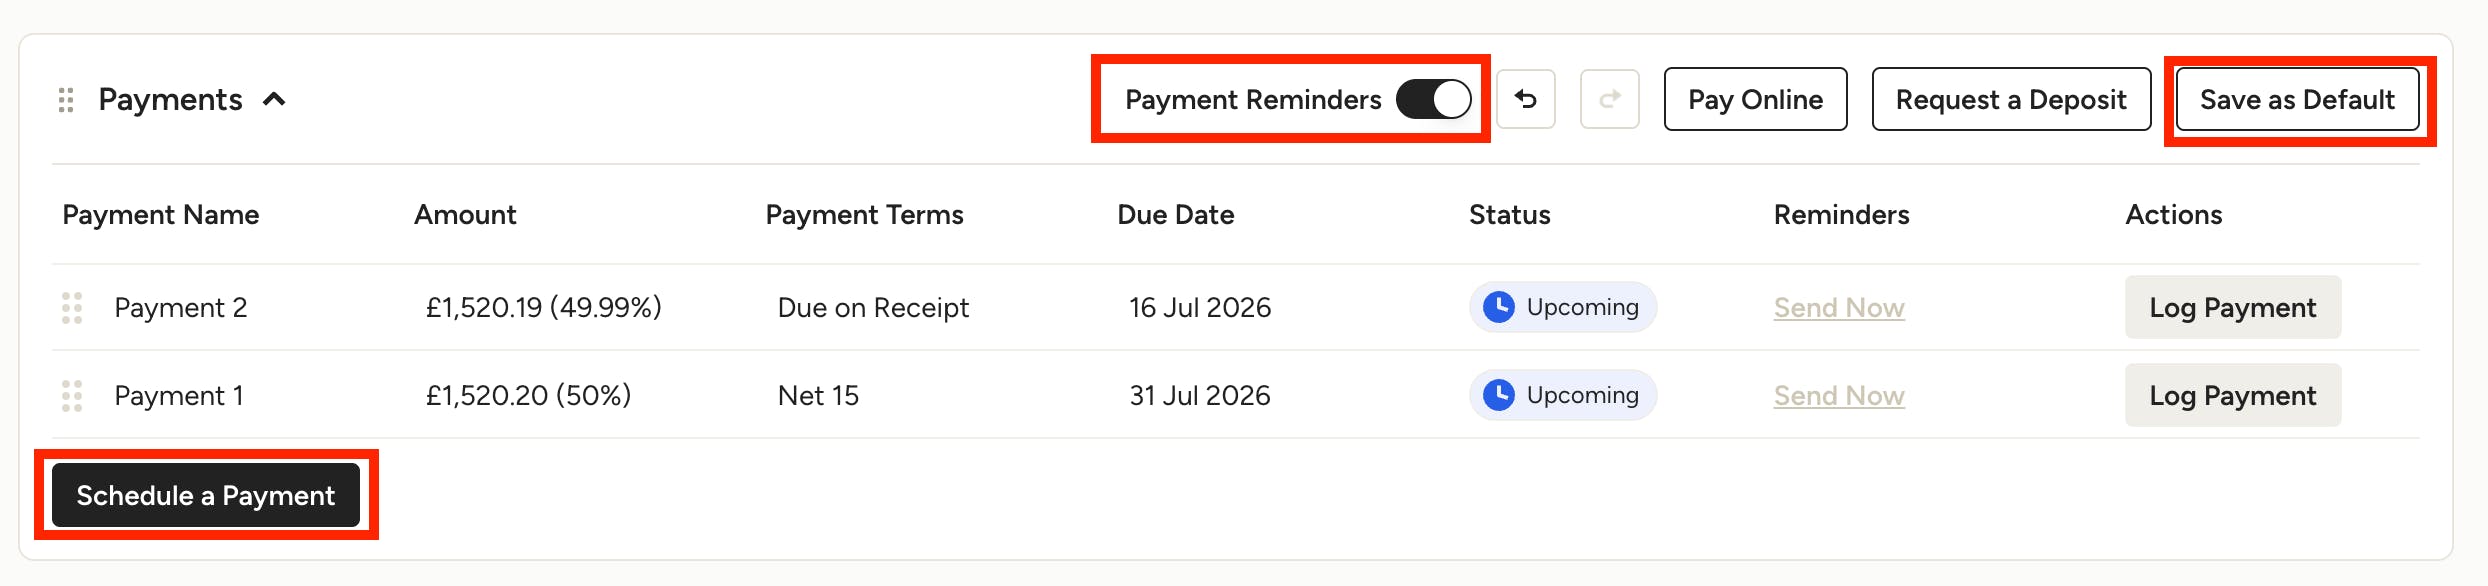
Payment schedules can be tailored for each document so that you can create a plan that suits the specific project and timeline. Within the Payment section you can create a payment schedule, save it as a default per document type and turn on Scheduled Reminders for the client so that you don't have to chase down your money once the document is sent.
Check out these resources to learn more about payment settings on each document type:
How to Create Scheduled Payments on Proposals
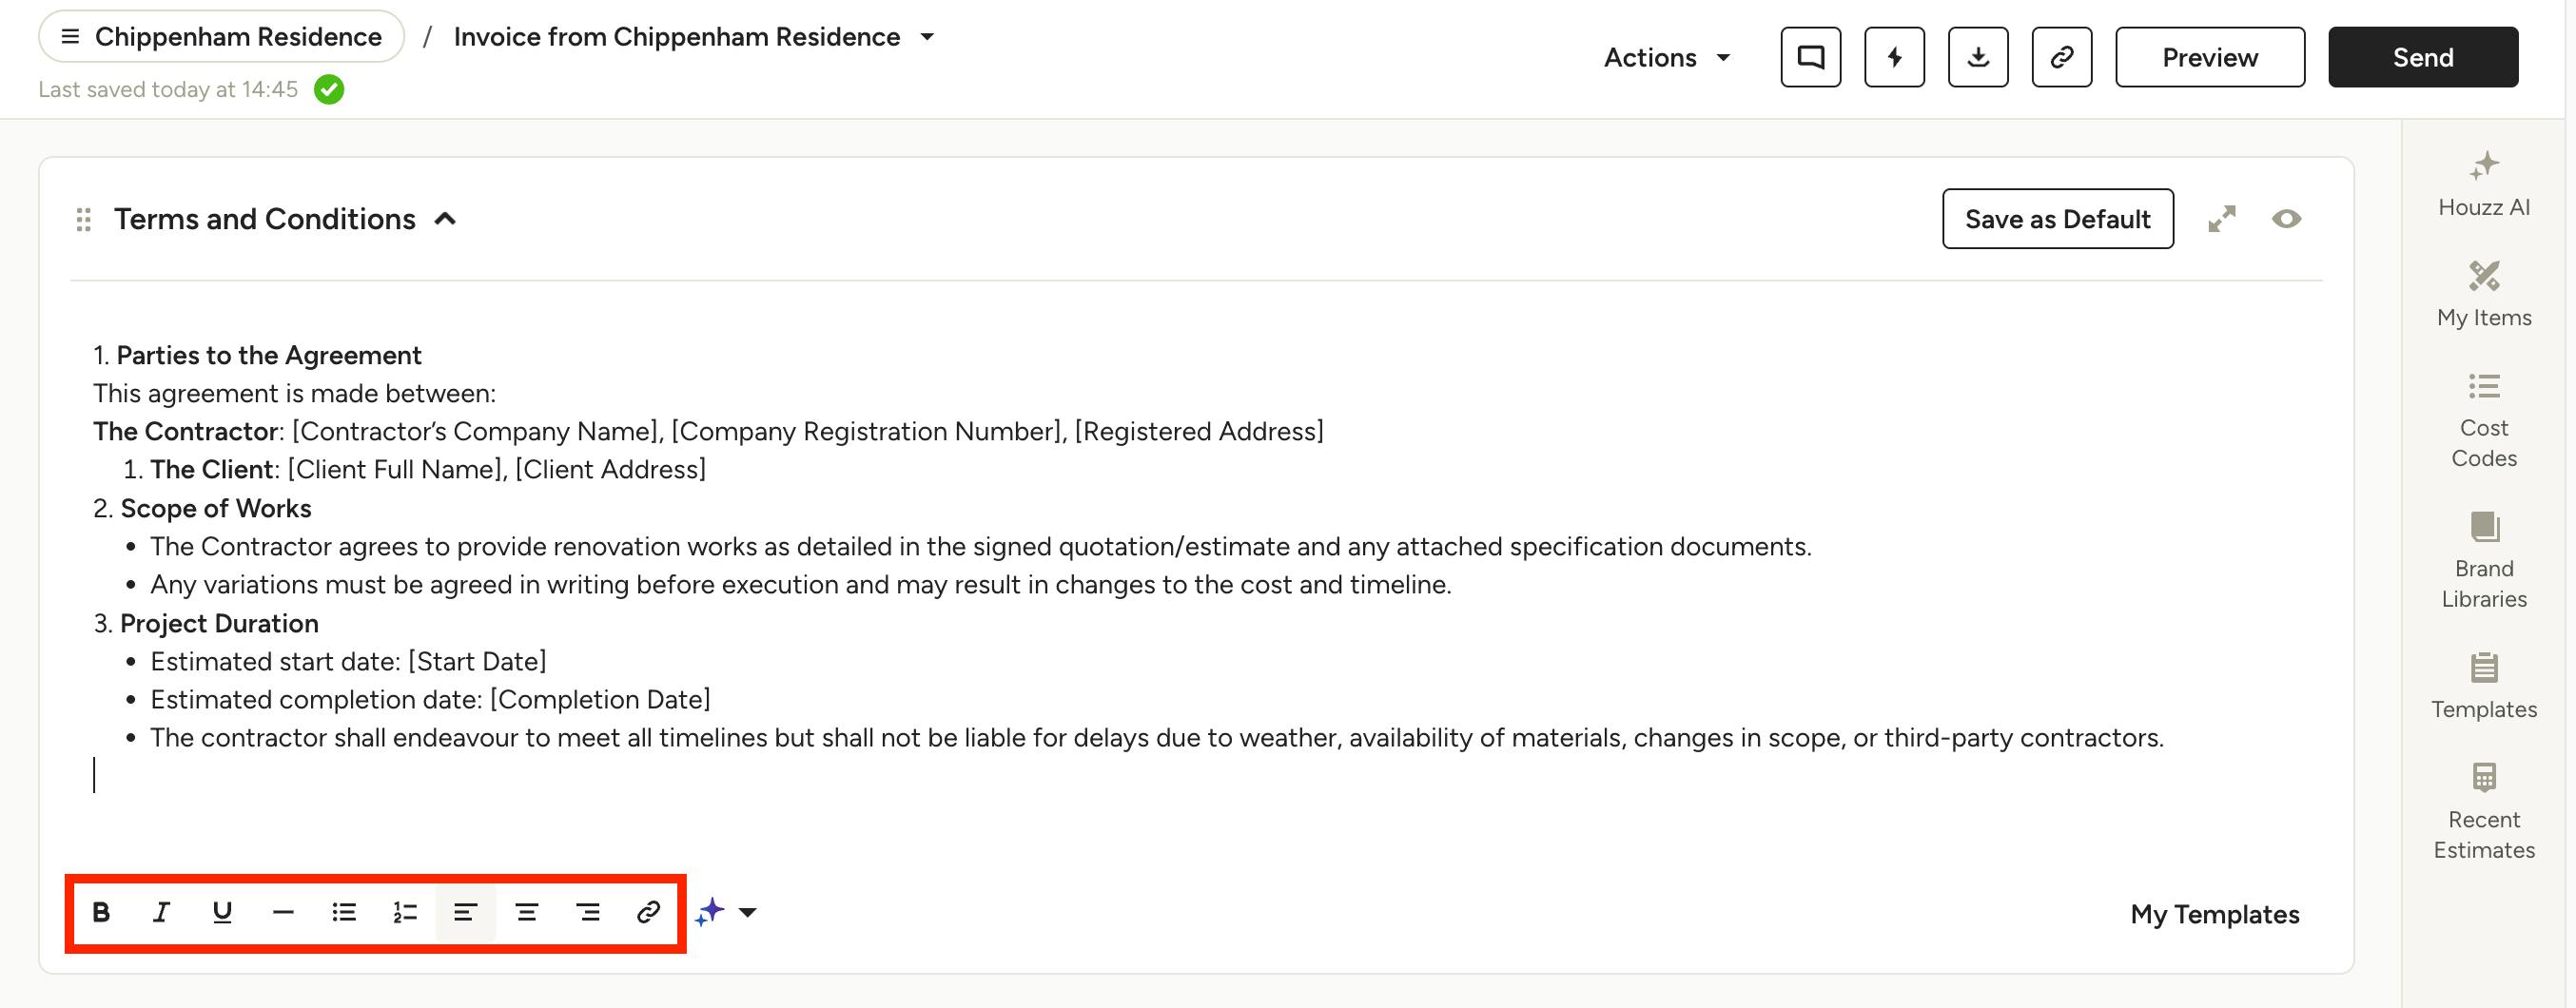
Terms & Conditions and Memos
Your T&C and Memo sections of your documents are fully customisable depending on what additional information you would like your client to know about the project and/or document.
Use the formatting options at the bottom of each section to customise the text to your liking.
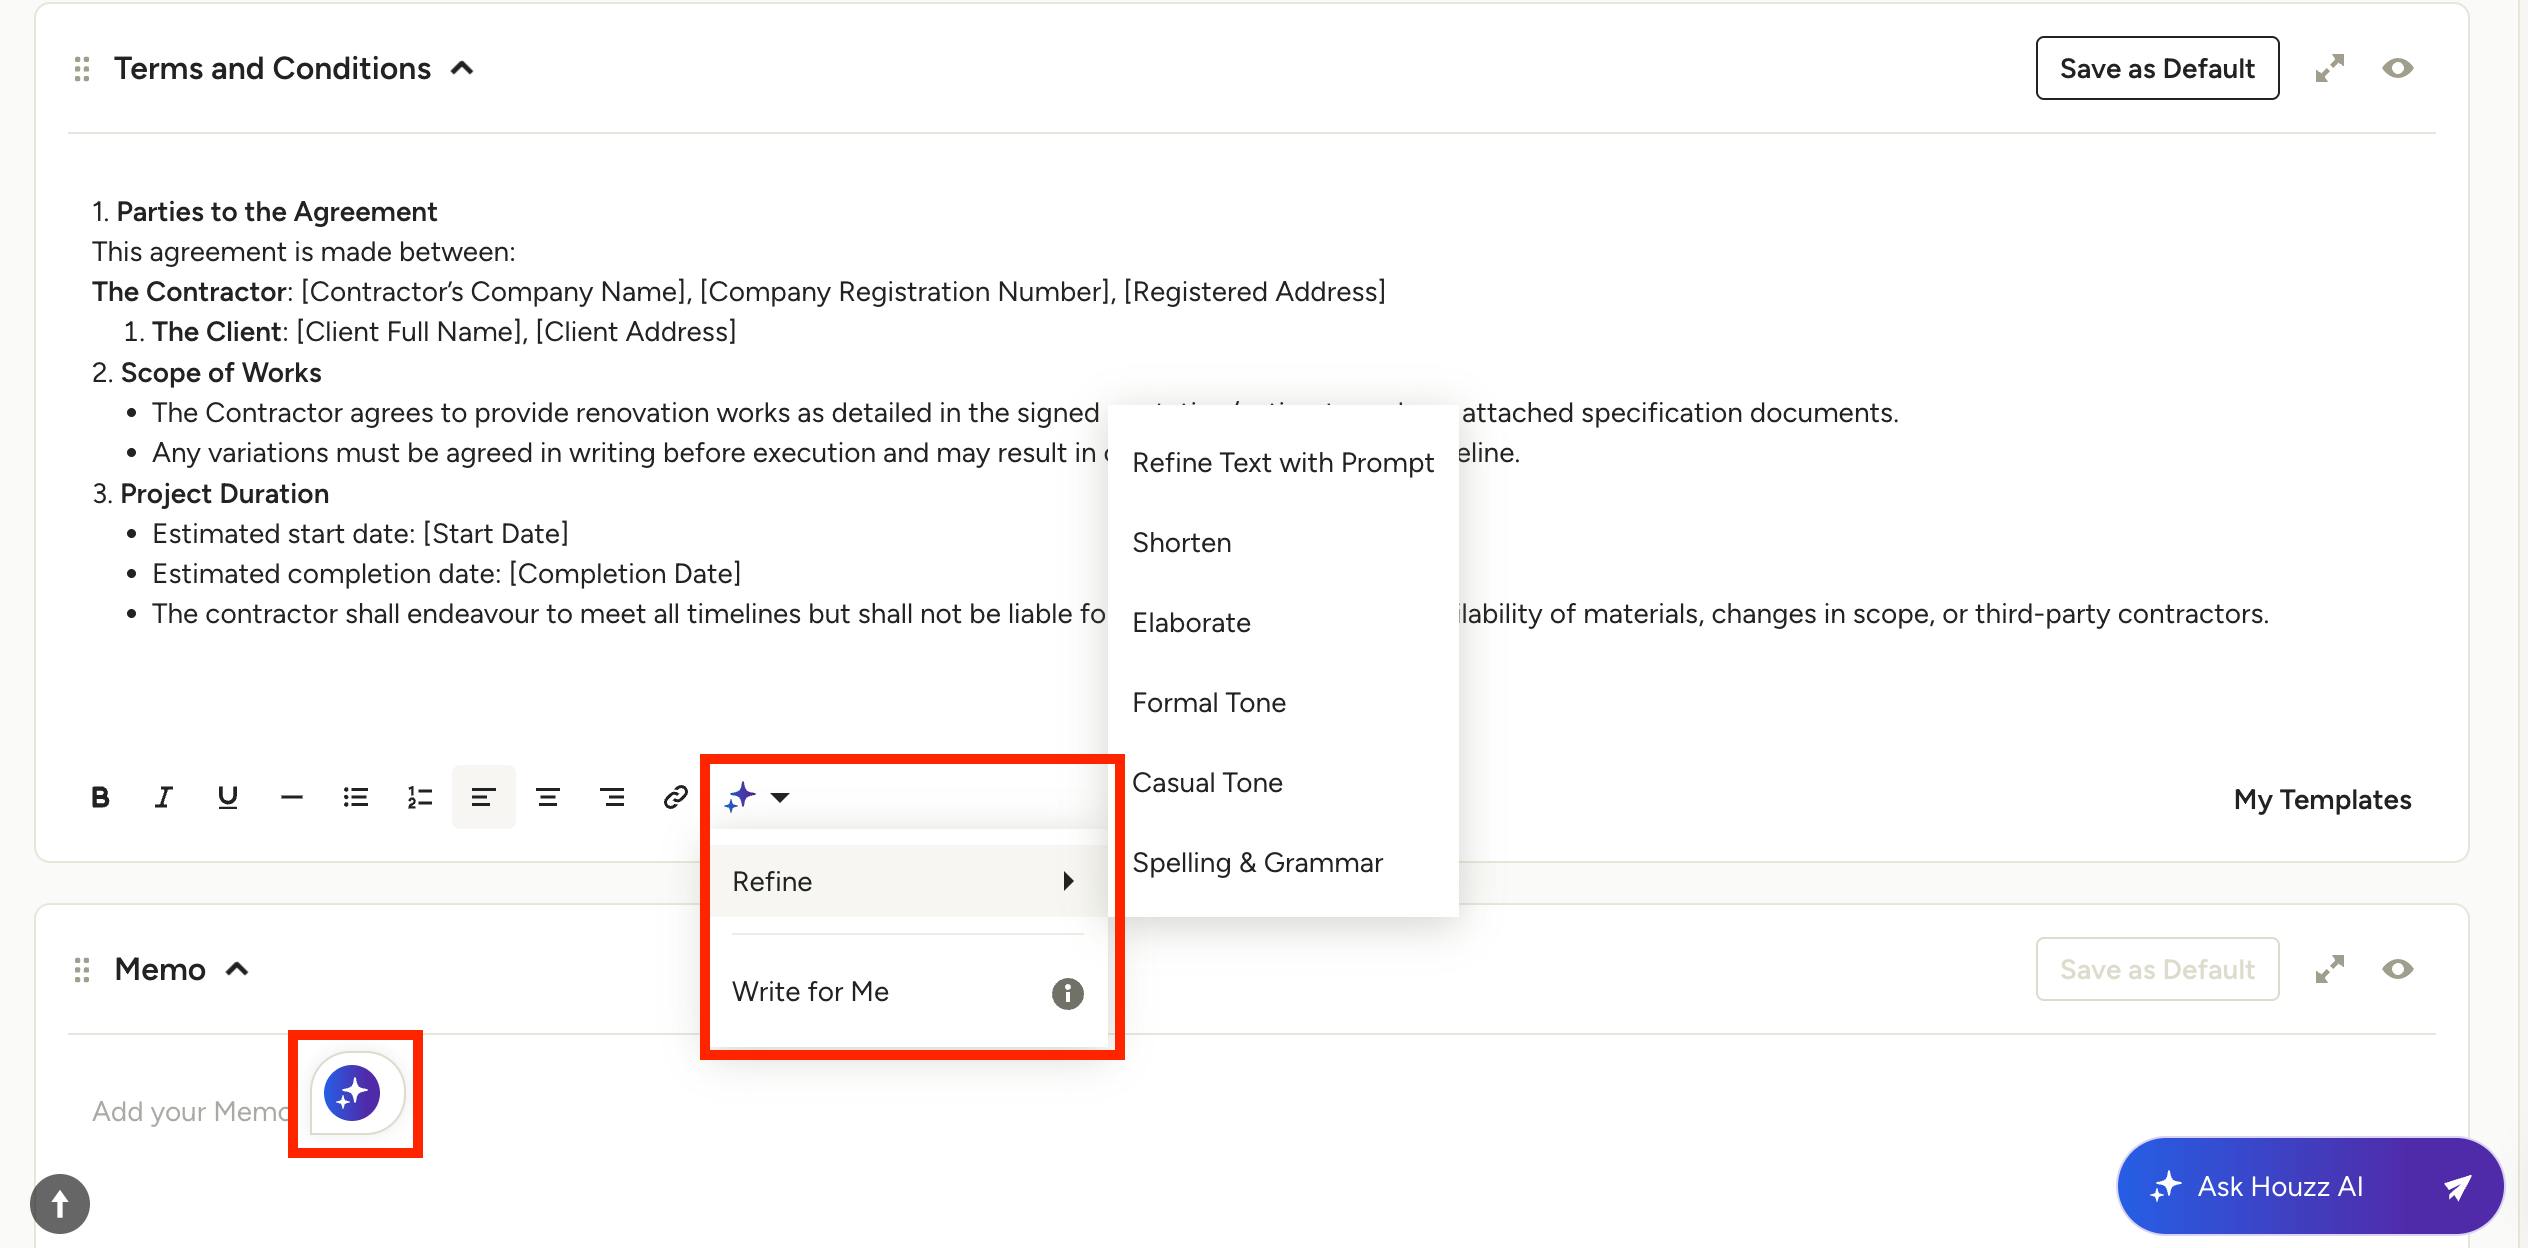
Use AI in Terms & Conditions and Memos
To help streamline the process of creating T&Cs and Memos on documents, Houzz Pro offers the option to quickly write or improve these sections using our AI.
- Write for Me will take the prompt you enter and write the T&C or Memo based on the document's info.
- Refine will take your existing T&C or Memo, analyse the text, and provide suggestions to improve clarity and formatting. It will even fix spelling, grammar and punctuation issues so all your company communication is polished and professional.
To use these features, click the purple Houzz AI button in the relevant section, then Write for Me or Refine – choose an option from the menu if using Refine.
If starting from scratch, you can click the Houzz AI button directly in the text input to initiate Write for Me.
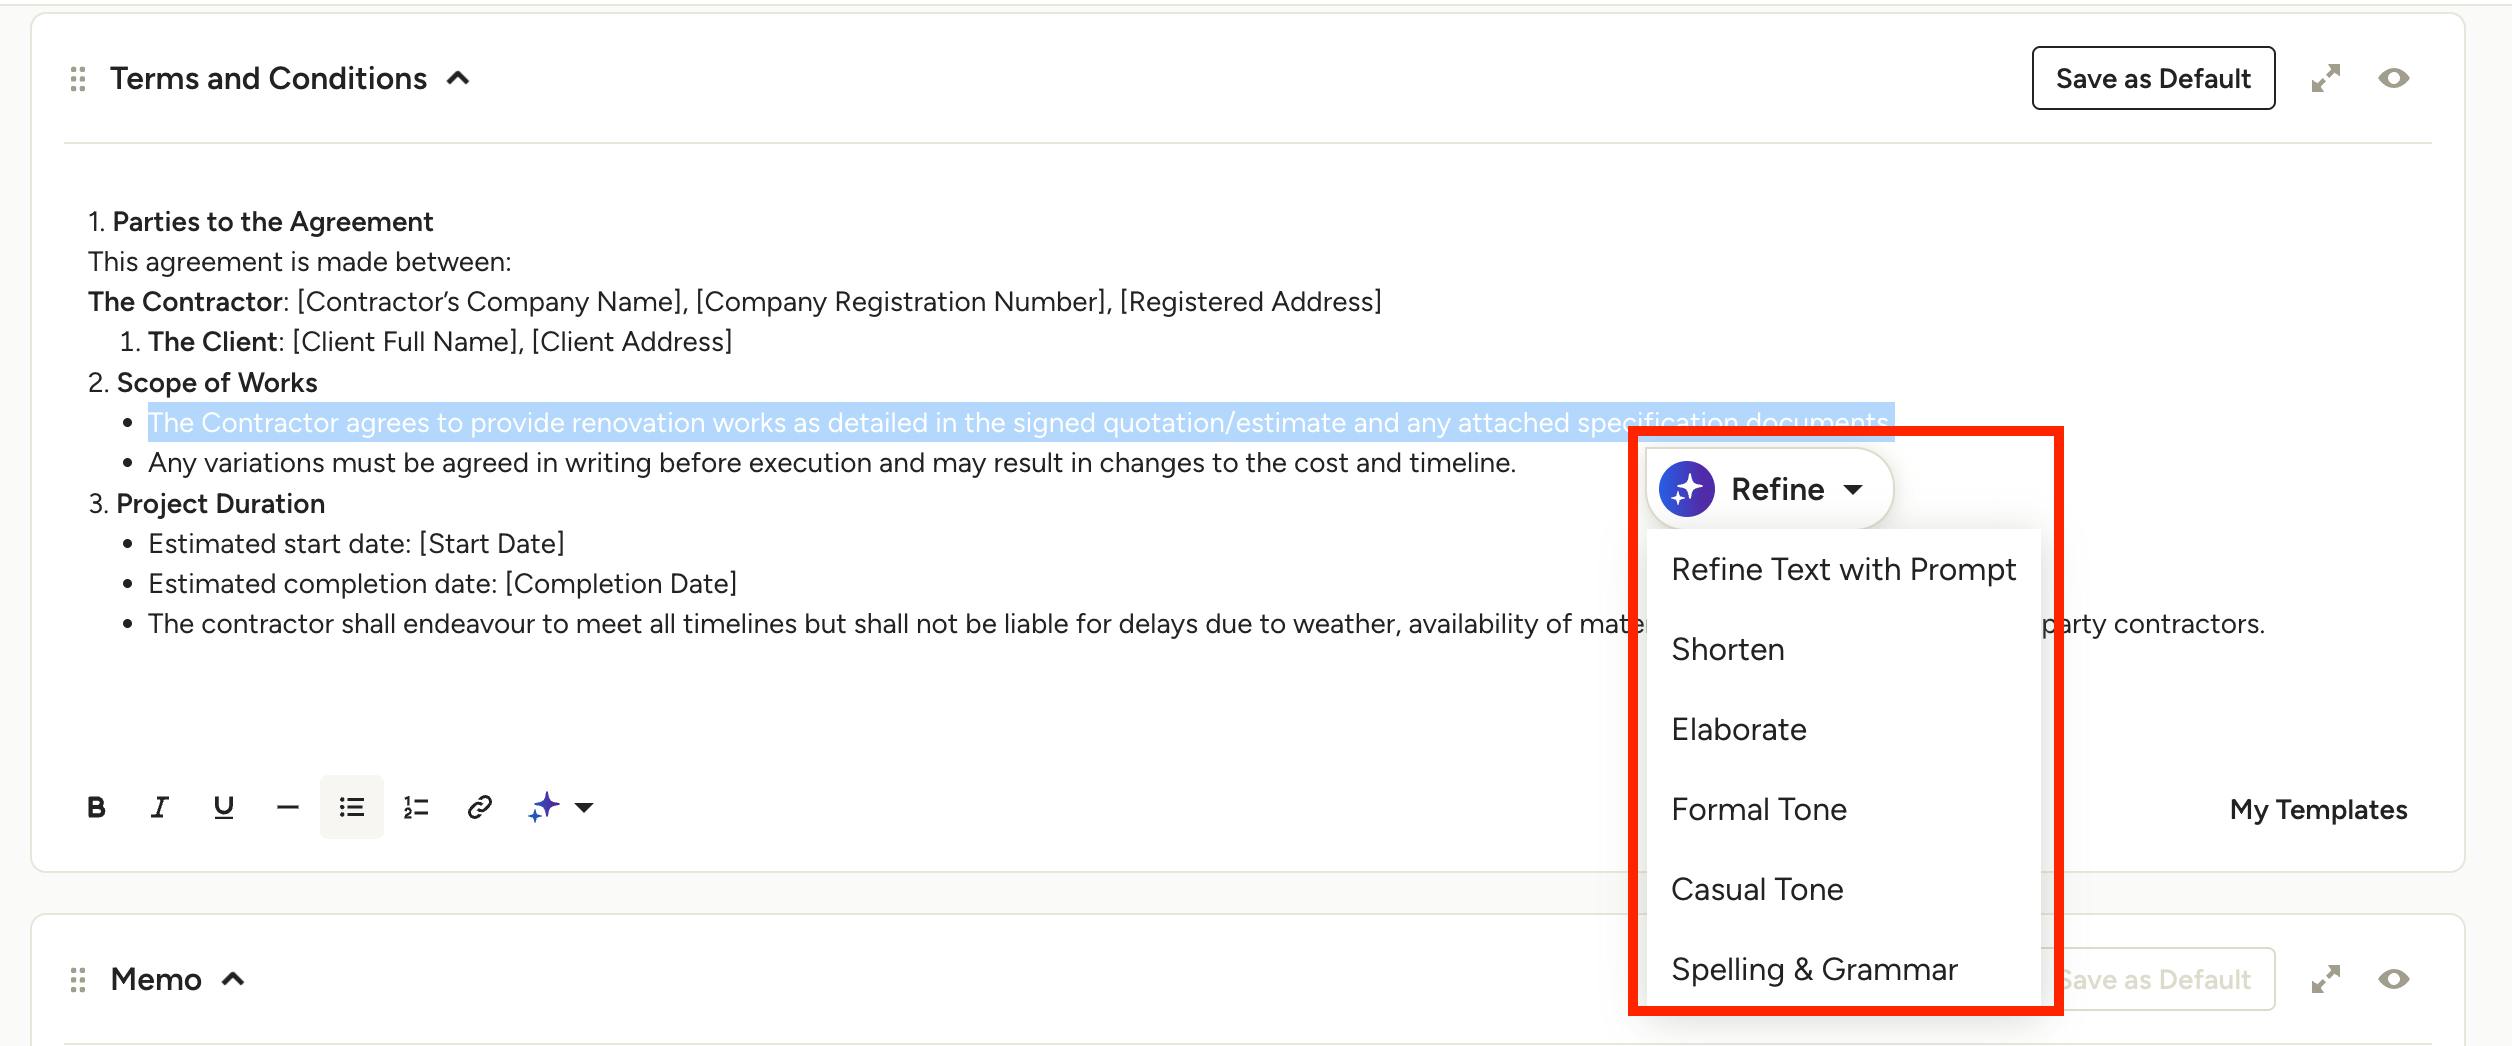
To use Refine on a specific section of text, highlight that text then click the Refine menu that appears.
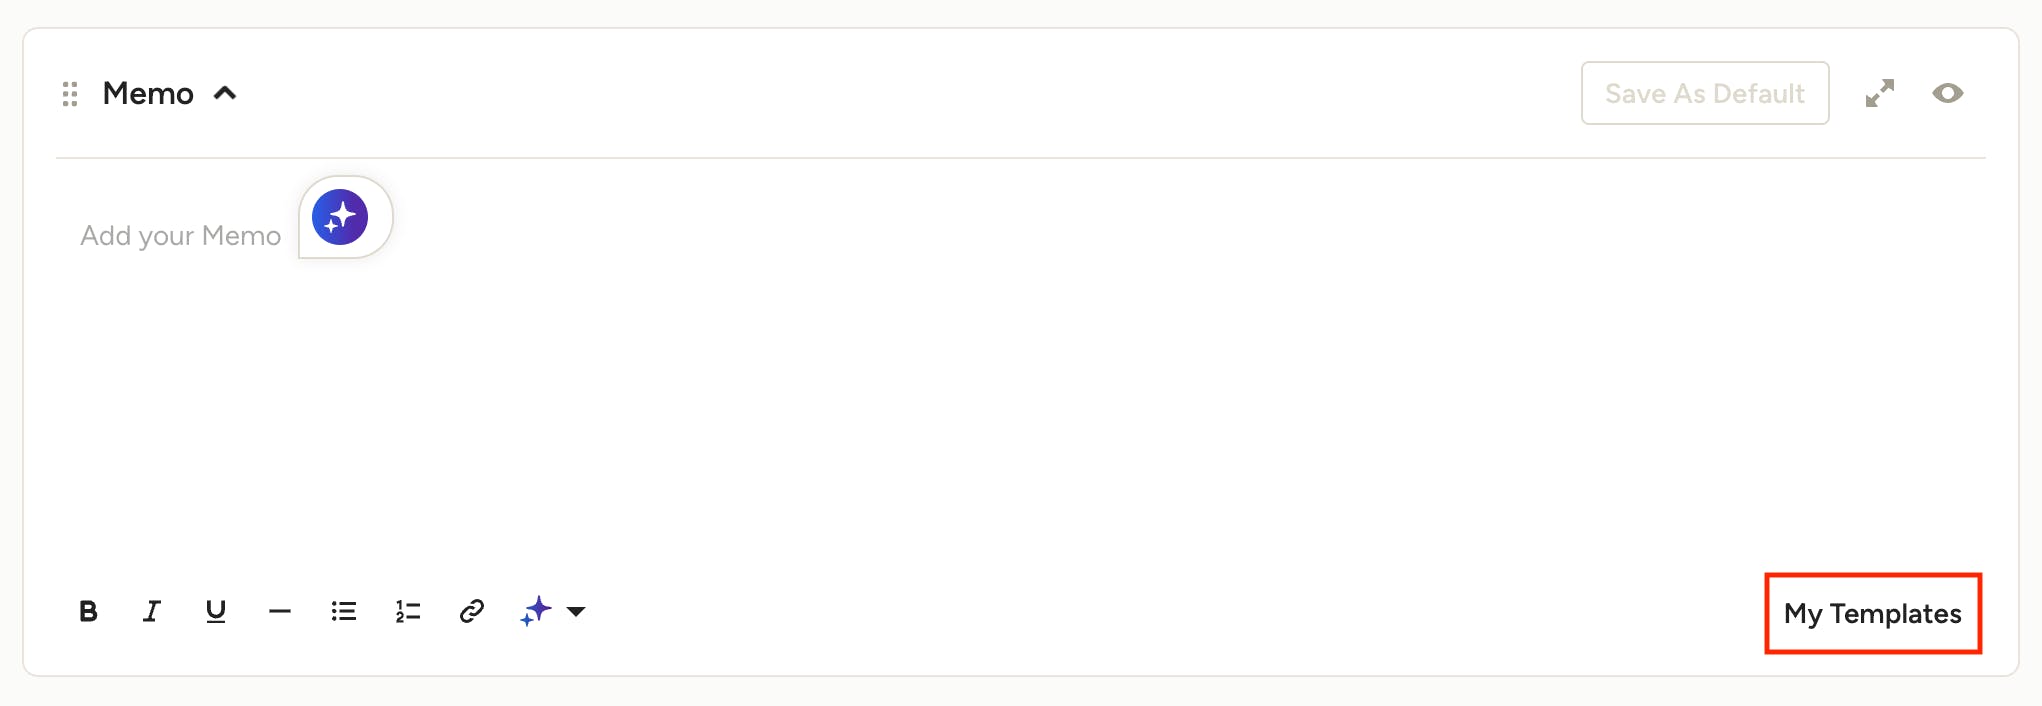
Save Templates
To view, edit and save templates for T&C and Memos per document type, click My Templates in the bottom of each section.
To learn more about using T&C and Memo templates, check out these resources:
Signatures on Documents
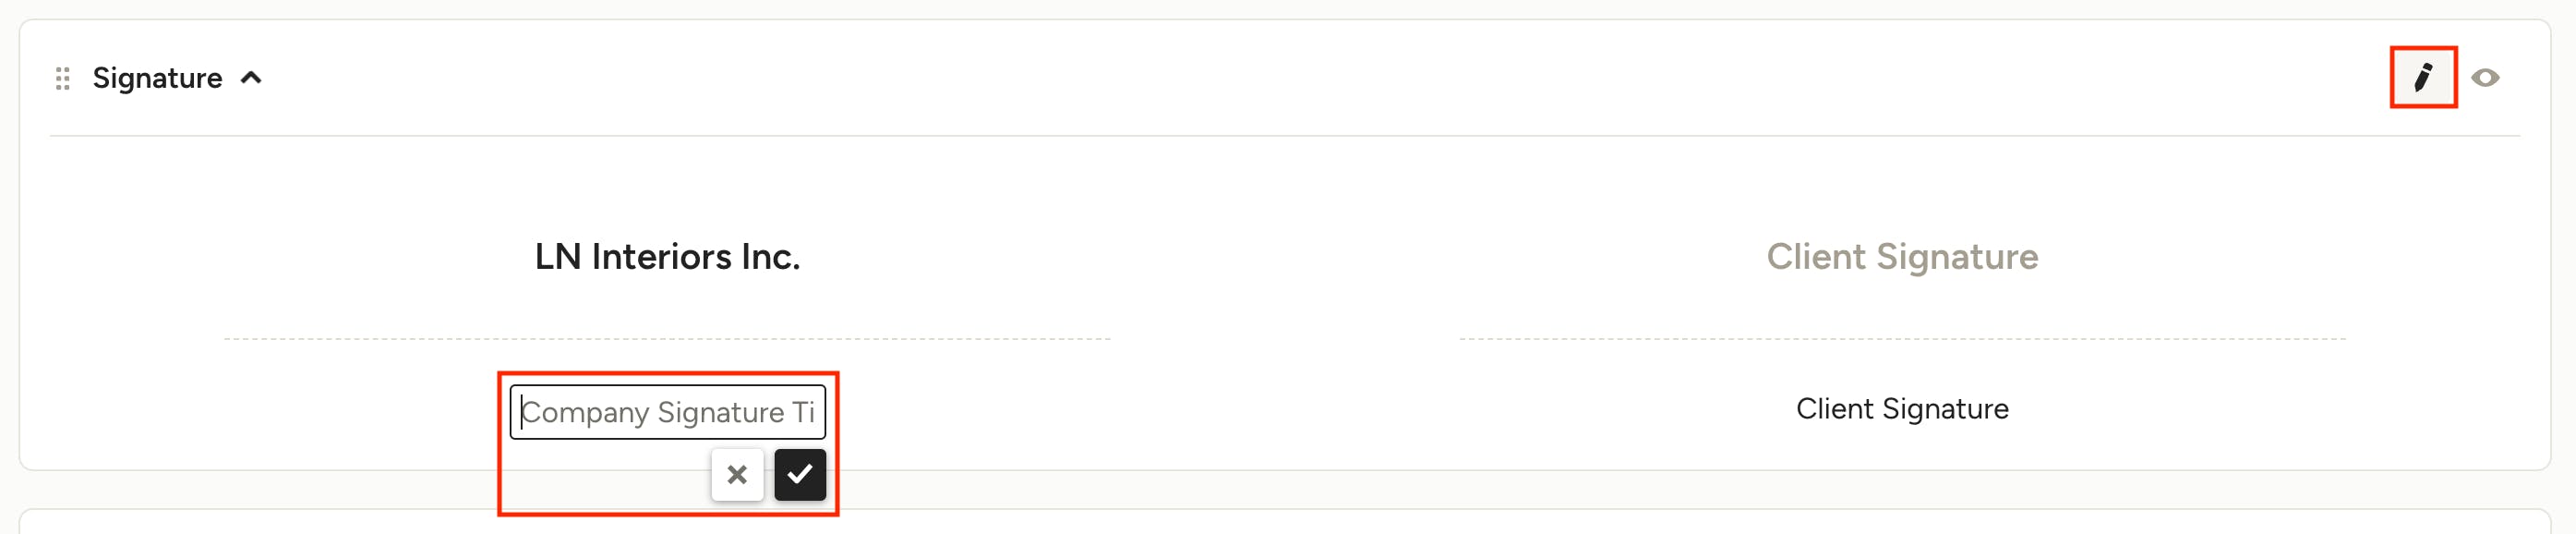
Signatures can be collected on estimates, proposals and purchase orders. Only one recipient signature can be collected per document. You can edit the company and client/supplier/subcontractor signature titles directly on the document by clicking them, making changes and clicking the tick mark to save the changes.
To view and edit all of the signature settings, click the pencil icon in the top right of the signature section.
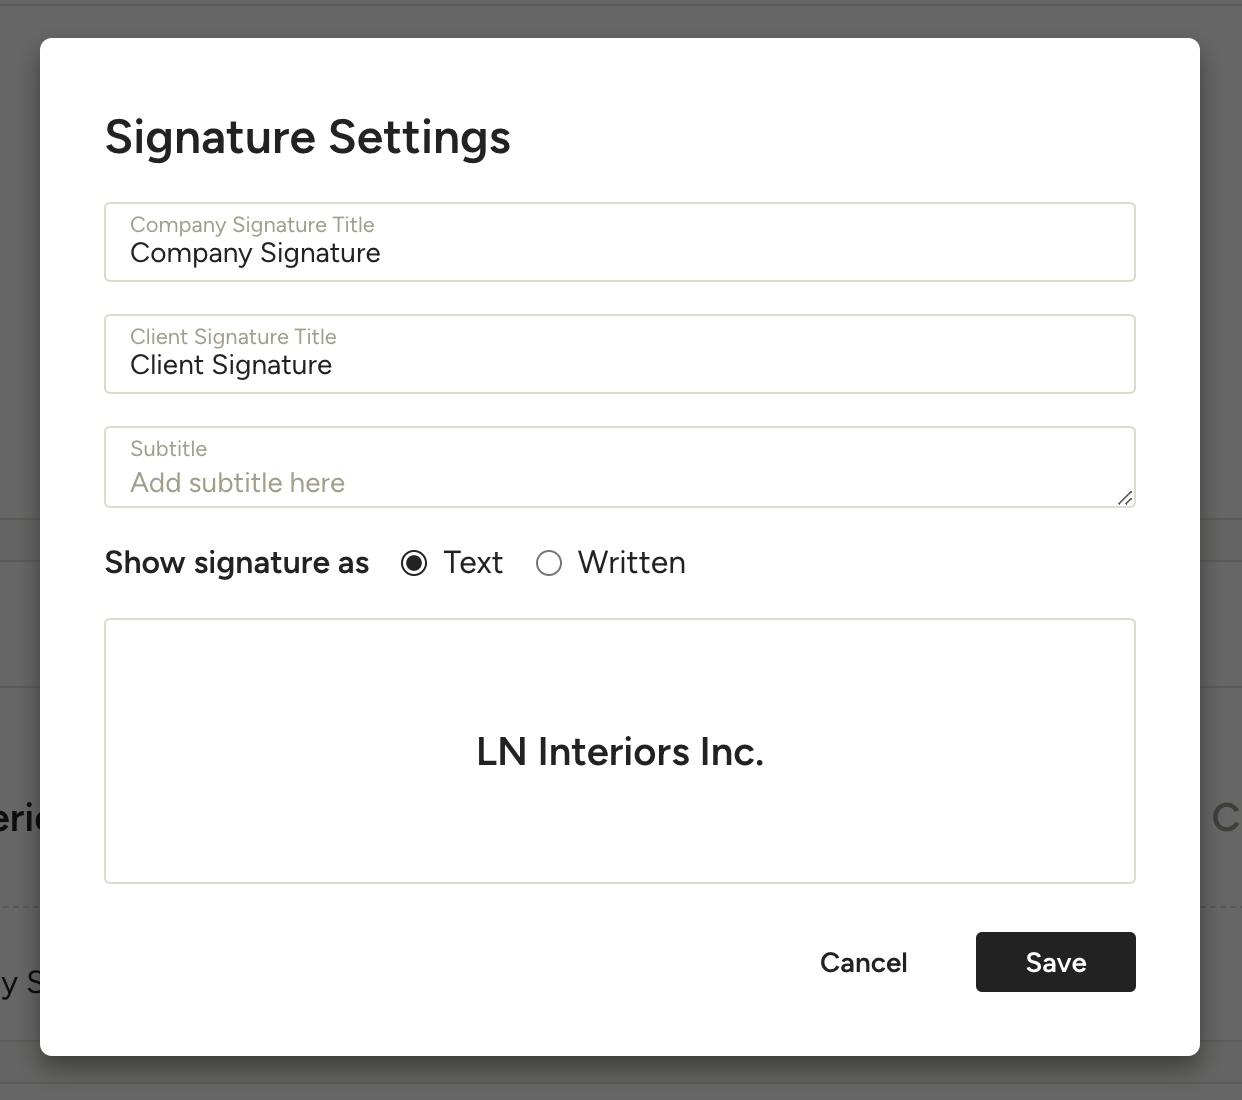
Within the signature settings, you can choose to display your company signature as text or written out using your mouse to sign. Click Save when you're done to apply any changes.
Show/Hide Document Sections
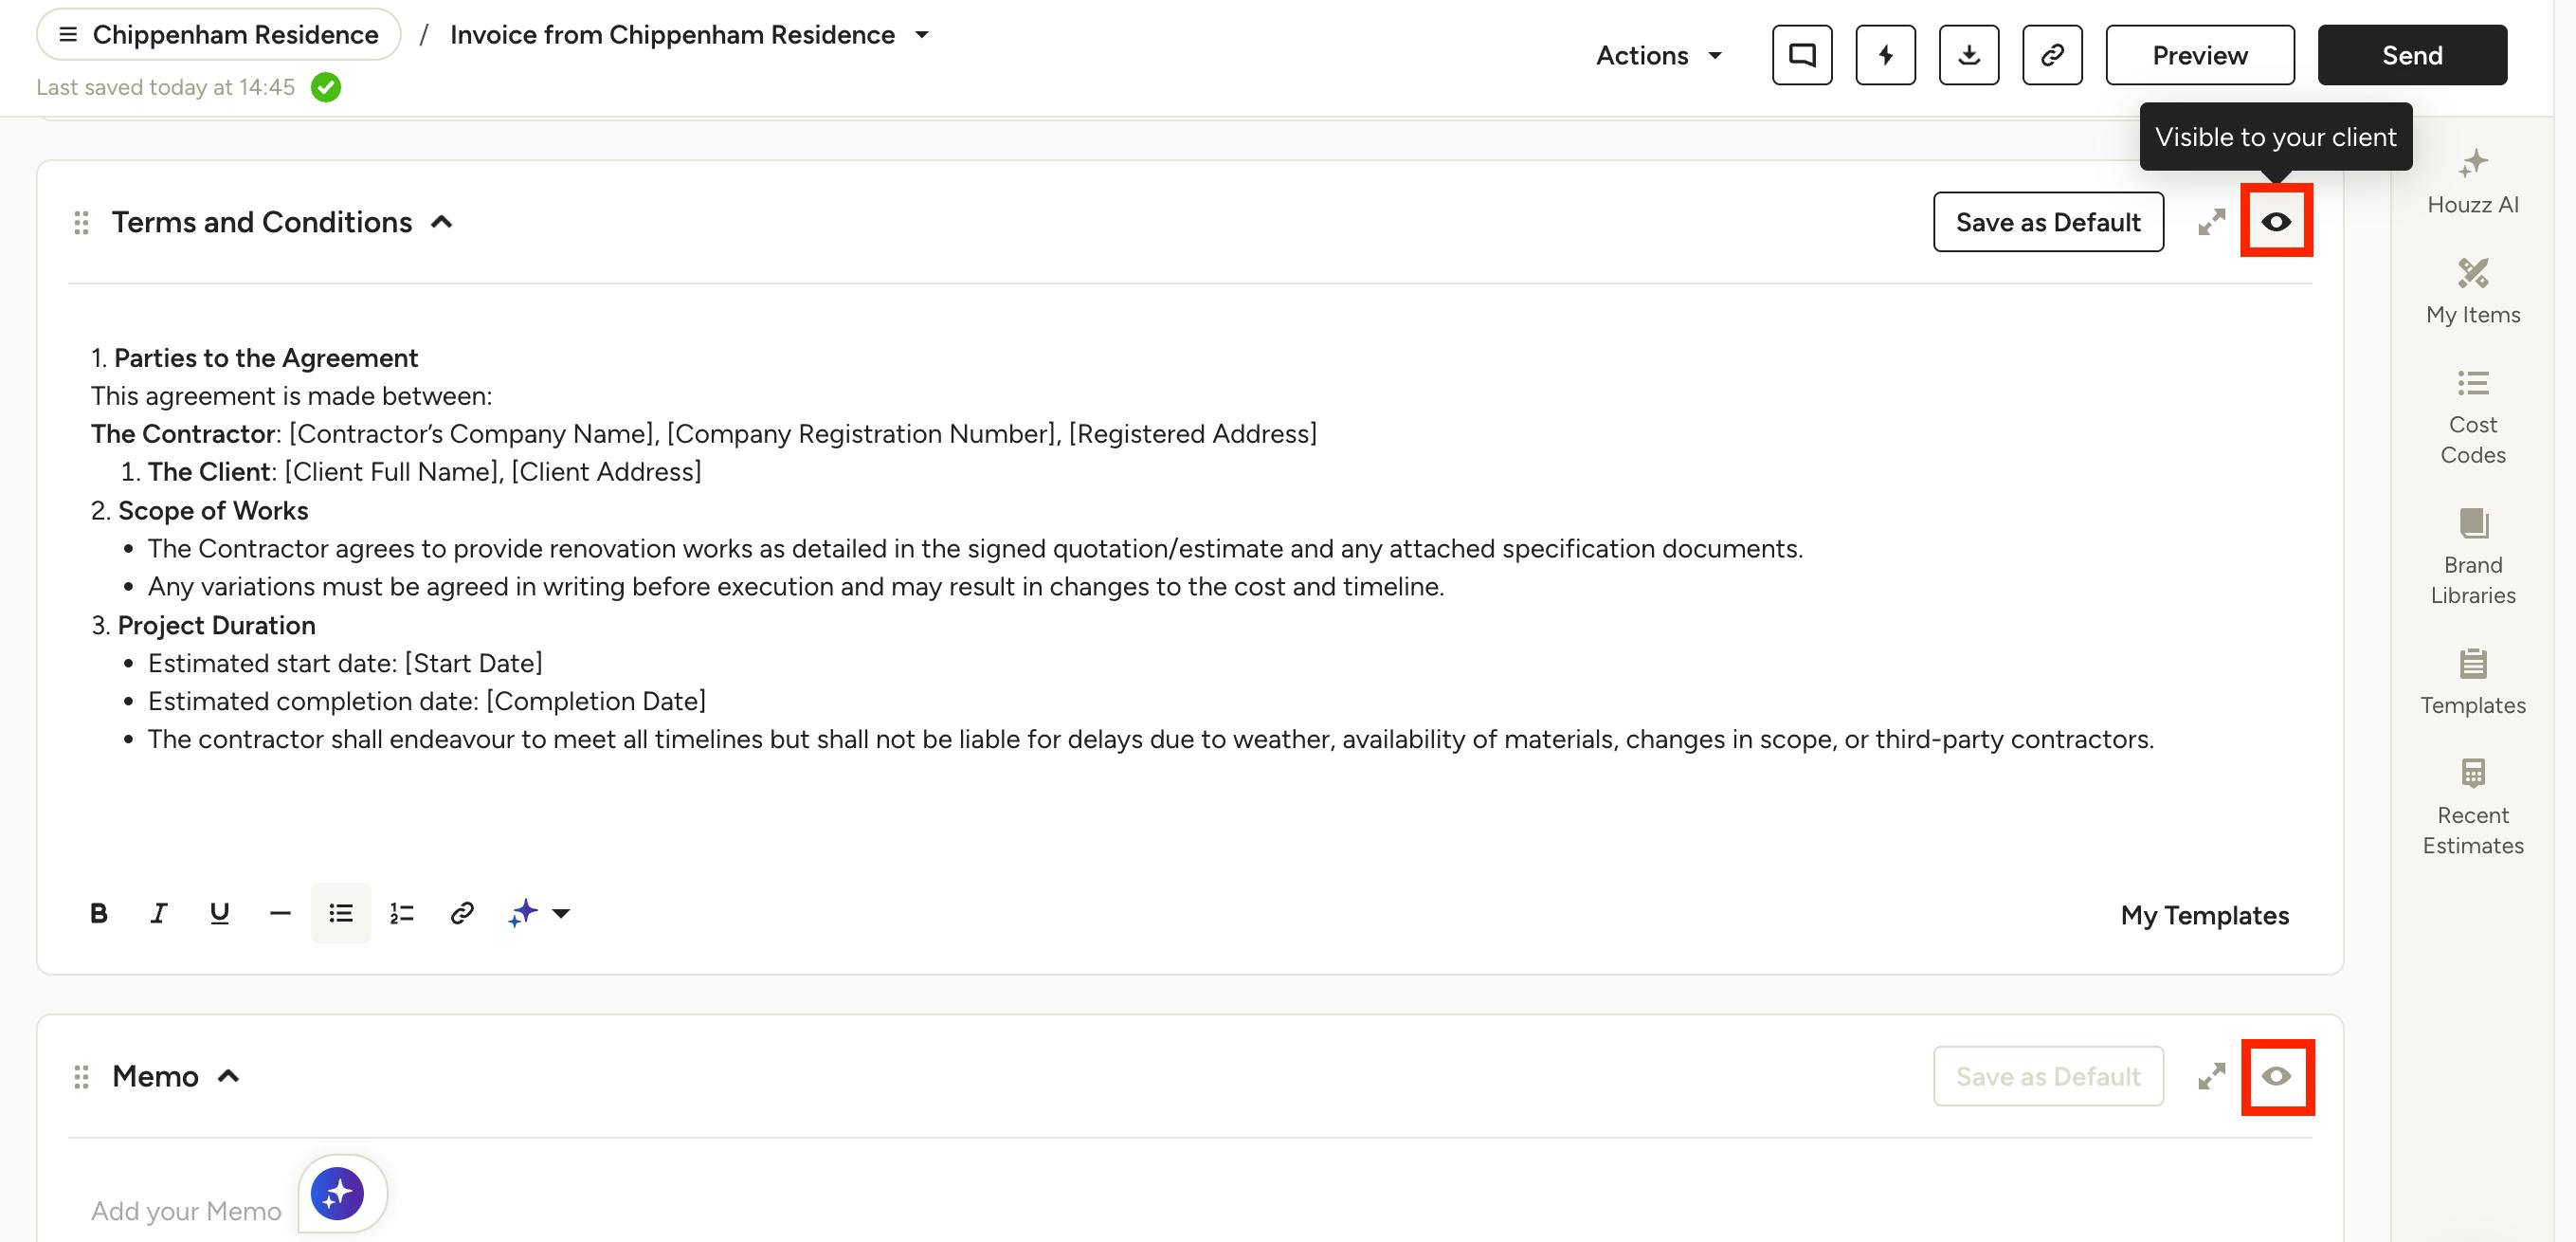
You have full control over what your client does or does not see on each document by changing the visibility settings per section. You can show or hide Files, Terms & Conditions, Memos and Signature sections by clicking the eye icon in the top right of each section. Hover over the eye to see the current setting. You can also click Preview at the top of the document to see exactly what your client will see.